Showing posts with label dessert. Show all posts

Sunday, December 5, 2010

Ginger Bars So Good, That I Couldn't Get a Picture in Edgewise

Ginger Bar

So in the world of college students, the time has come:

-We begin to drink so much coffee that our blood is replaced with caffeine.
-People move into the library and become dreadfully vicious about guarding their study nooks.
-Laundry is forgone and even the trendiest of students are spotted in sweats and Uggs.
-And yes, the local grocery stores run low on Ramen and Macaroni and cheese while everyone stocks up on quick meals.

Because finals are upon us. (Please insert that screechy violin music from Psycho right here.)

In a few weeks time, the semester will be over and I'll be packing up my belongings to head home for the holidays. But in the meantime my hours will be spent pouring over notes and writing so many essays that my fingers become fatigued.

I'm not sure how often I'll be able to post, because anything non-academic right now just makes me feel guilty (I can hear my mother's voice saying, "Why aren't you studying?" It's pretty haunting, let me tell you.

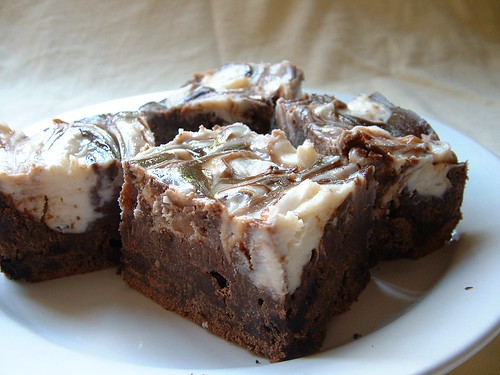
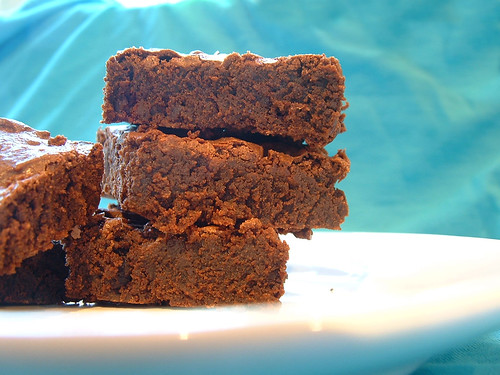
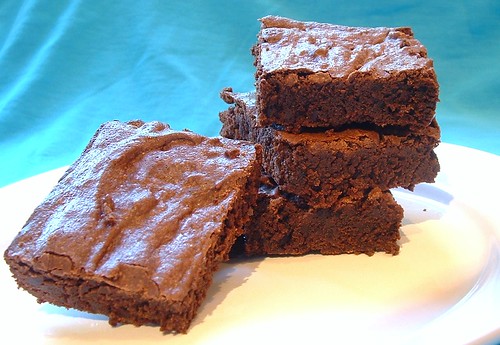
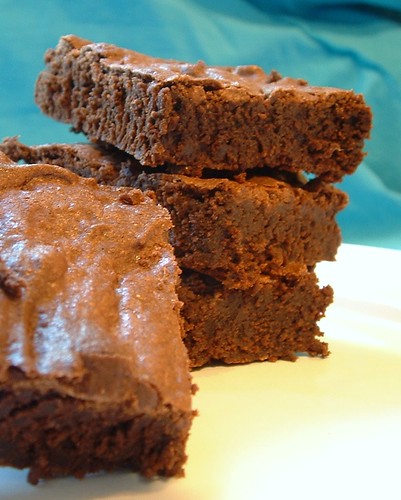
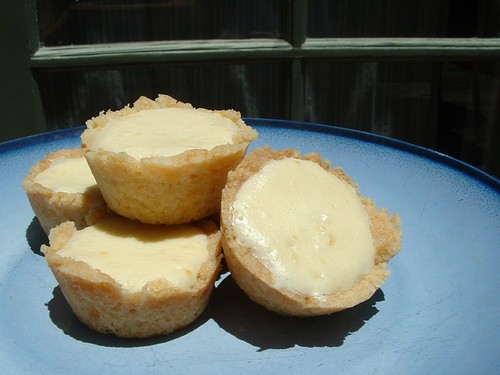
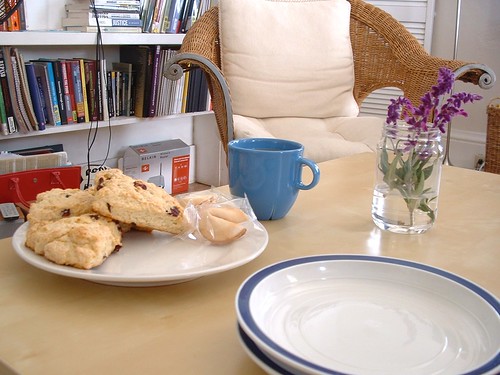
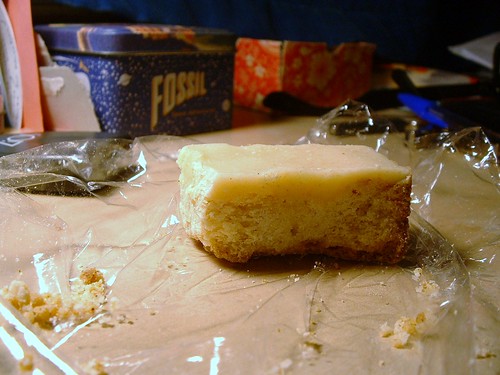
But until we meet again, here's a lovely recipe for you. These ginger bars were so lovely that my roommate and I scarfed them all down before I could take a decent picture. Just as I was about to bite into the last one, I remembered my camera and quickly shot a picture on my (very messy) desk. Whoops.

(By the way, the Fossil box in the background is from a watch my mom got years ago. It has an astronaut on it. It's awesome. I keep all of my spare change in there. Didn't you know that astronauts are the best security guards for coins?)

Recipe for Ginger Bars:
Adapted from Technicolor Kitchen

Print Me! 

Base:
2 2/3 cups all purpose flour, sifted
1 teaspoon baking powder, sifted
2 teaspoons ground ginger, sifted
1 cup + 1 ½ tablespoons caster sugar
250g cold unsalted butter, chopped

Ginger icing:
150g unsalted butter, chopped
¼ cup corn syrup
1 ½ tablespoons ground ginger, sifted
1 2/3 cups icing sugar, sifted

1. Preheat oven to 350F. Spray/butter an 8x12 pan, set aside.
2. For the base: In a medium bowl, combine flour, baking powder, ginger, and sugar. Add the butter and incorporate using a pastry cutter or your fingers until the mixture resembles fine breadcrumbs (very important to not overmix!). Press and pack the mixture into the bottom of the pan and bake for 20-30 minutes until the top is golden and slightly firm. Cool completely.
3. For the icing: Place butter, corn syrup, and ginger in a saucepan and heat over medium. Cook 2-3 minutes until butter is melted. Add icing sugar and whisk to combine. Pour the icing mixture over the cooled base and refrigerate 1 hour until set. Cut bars with a sharp knife and enjoy!

Tuesday, November 16, 2010

Brown Butter Honey Ice Cream

Brown Butter Honey Ice Cream 2

I know I know, it's mid November and the temperature of ice cream pretty much equals the temperature of my apartment at 6 in the morning. But there's always going to be a soft spot for ice cream in my heart. 

And man oh man, this one will have a permanent room in the hotel of my ice cream loves (right next to Cherry Garcia... yummmm).

Pretty much everything that goes into this ice cream is wonderful (brown butter? Yup. Honey? mhm.), and when you tell people that you made brown butter honey ice cream, trust me when I say that you'll feel super fancy and elegant.

Think I'm making it up? Let me show you a picture of what was left of my ice cream by the time I took a picture of it. Between myself, my room mate, and some friends we had over, only a sad little quantity was left to photograph. Whoops.

Brown Butter Honey Ice Cream

But here's the bummer: I did something wrong. The ice cream had a weird, gritty texture (perhaps this was good thing - it made it last a little longer that way!). I don't know what happened - perhaps I didn't temper the eggs correctly and they started to scramble? Maybe my honey was getting old? I'm not sure.

Regardless, I'm definitely planning on making this ice cream again. Move over, Ben & Jerrys - between my brown butter honey ice cream and my Buttermilk Ice Cream, I'd make a mean profit as an ice cream vendor! Well, maybe not yet, but give me a few more flavors- I'll get there!

Recipe for Brown Butter Honey Ice Cream:
Adapted from Chez Us

300ml full fat organic milk
300ml organic heavy cream
4 organic egg yolks
½ cup organic wildflower honey
1/2 cup unsalted butter, cut into slices

1. Brown the butter: Heat a saucepan over medium heat. Add the butter, stir continuously. Butter will begin to foam, and eventually small brown specks will appear and the butter will start to smell slightly nutty. Remove from heat when golden (the butter will continue to cook when removed from heat, so make sure not to leave on the heat too long!). Let cool.
2. Make ice cream: Combine milk, cream, and honey in a saucepan. Bring to a small boil. Remove from heat and temper egg yolks by adding a small amount of the milk mixture to the yolks, stirring constantly. Once tempered, slowly add to milk mixture and whisk together. Return pan to a low heat and simmer slightly for 5 minutes, stirring constantly. Remove from heat and let cool. When cool, stir in browned butter and let sit in fridge for at least 30 minutes. Then put it in your ice cream machine or look at my Buttermilk Ice Cream post to see how to make ice cream without a mixer.

Wednesday, November 10, 2010

Pumpkin Pasties

Pumpkin Pasties

If you're not a Harry Potter fan, I'm sorry to say that the majority of this post won't make sense to you. However, I still encourage you to make this recipe, because pumpkin pasties are like pumpkin pie bites with an amazingly satisfying crust-to-filling ratio. So good.


Anyhoo, this Halloween, I spent my evening at Hogwarts:

I dressed up in my S.P.E.W. hat, donned my clunky 3-D glasses frames with the punched out lenses, and drew a lightning bolt on my forehead.

I greeted trick-or-treaters with a faux British accent.

I played the Harry Potter soundtrack loudly.

But the best part? Making butterbeer and pumpkin pasties.

My roommate (who is also a huge Harry Potter fan) and I assembled the pasties, which are an incredibly stress-free dessert to make, and then sat down to watch the first movie while we ate our treats. I literally felt like I was transported into the story, because I could just imagine that I was sitting next to Harry, Ron, and Hermione while they ate their pumpkin pasties at the Halloween feast. It was the best Halloween I can remember having in quite some time!

(PS... If you'd like the recipe for butterbeer, which is quite delicious -and non-alcoholic- , let me know and I'll hunt down the recipe!)


Recipe for Pumpkin Pasties:
Adapted from here

Print Me!

2 9 inch pie crusts (the store-bought rolled out ones work best)
1 can cooked pumpkin
One egg
2 teaspoons of pumpkin pie spice (or a combination of ginger, ground cloves, cinnamon, and nutmeg)
One cup of sugar
One beaten egg mixed with 2 tablespoons of milk for eggwash
Extra sugar for sprinkling

1. Preheat oven to 350F. Mix together the pumpkin , egg, spice mix, and sugar in a medium bowl.
2. Using the edge of a glass or a round cookie cutter, cut 3-4 inch circles from the unbaked pie crust. Place a tablespoon of the pumpkin mixture on half of each circle. Fold dough over to form a semicircle and press envelope closed with the tines of a fork.
3. Brush tops of the pasties with eggwash mixture. Sprinkle with sugar.
4. Place in oven and cook for 12 minutes until the tops are golden brown.

Saturday, October 30, 2010

Oreo Cream Cheese Brownies

Cream Cheese Oreo Brownies (2)

I still remember the first time I decided to share one of my baked goods. I was a junior in high school and my AP Music Theory class was having a party for some reason (only we called it a "Cultural Gathering" because that made it more school appropriate, of course). I baked Peanut Butter Cookies, packed them ever so carefully in my mother's tupperware containers, and sat with them in my lap on the bus all the way to school.

At the beginning of our cultural gathering, I gingerly opened the tupperware and set my cookies on the table surrounded by generic bags of chips and a few odd pieces of candy. I was nervous - what if nobody ate my cookies? What if I had mutant tastebuds and for some reason the cookies that I thought were so delicious were actually really, really gross?

I mentally bit my nails in apprehension, and then the test of all tests: my music teacher took a cookie. She also took a chocolate chip cookie that someone else in the class had made. After a few minutes of chewing and thoughtful deliberation, she said, "Wow, sorry to whoever made these peanut butter cookies, but these chocolate chip cookies OWN them." (Needless to say, she wasn't the most considerate person I've ever met.)

But my heart was crushed. My cookies were lame. I didn't bake for anyone outside of my family for years after that, and on the rare occasion that I did, I would get ridiculously nervous.

Cream Cheese Oreo Brownies

Since the start of this blog, however, I've become more confident with my baking skills and I'm almost positive I don't have mutant taste buds (although my preference for peanut butter in my oatmeal might make some question). Because of this, I decided to bring brownies to one of my classes this semester.

This particular class, a 15 person seminar taught by an honest-to-goodness professor, is way WAY out of my comfort zone. I'm used to being taught by grad students. I'm used to being nearly invisible amongst the 300+ students in my lecture halls. I'm used to absorbing information, rather than giving my imput. Basically, this class is scaring the living daylights out of me.

But I've started bringing my baked goods with me, and this small action has helped me chip away at my fears, because it gives me an entrance talking point, rather than having to jump into dense, complicated Chinese politics right off the bat. Now my mind can rest easy knowing that even if my intellectual comments might not be the most insightful in the room, at least I make gosh darn delicious desserts.

Cream Cheese Oreo Brownies 3

If you are thinking of taking something to share with others and you are scared about mutant taste buds, you'll have nothing to fear with these cream cheese oreo brownies. I'm glad I took them to class, because I honestly think my roommate and I would have eaten the entire pan in the course of a day. The chocolate brownie base is crunchy from the cookies, but the cream cheese topping gives the brownie a creamier, more decadent flavoring. My only gripe with this recipe is that I couldn't really taste the oreos. It may have been due to the generic brand I opted for, but my advice is to increase the oreo amount a little bit and definitely stick with the name brand.

Recipe:
Adapted from Annie's eats 

Print Me! 

1/2 cup unsalted butter 
3/4 cup sugar
1 cup all-purpose flour
1/2 cup unsweetened cocoa powder (Dutch or natural is fine)
1/2 teaspoon salt
2 large eggs
1/4 cup milk
1 1/2- 1 3/4 cup coarsely chopped Oreo cookies
6 ounces room tempurature cream cheese
1/2 cup powdered sugar
1 1/2 teaspoons vanilla extract

1. Preheat oven to 350 F. Line an 8 x 8 baking pan with parchment paper and spray with cooking oil.
2. In a small sauce pan, mix butter and sugar over medium heat. Bring to a boil, making sure to whisk frequently. Let boil for 1 minute, then remove from heat to cool slightly.
3. In a medium bowl, whisk together flour, cocoa powder, and salt. In the pan with the cooling butter/sugar mixture, add the eggs. Whisk until well blended. Add milk and whisk until well blended. Add the wet ingredients to the flour mixture and stir until just incorporated. Fold in the chopped Oreos and spread batter in the pan.
4. For the cream cheese topping, combine the cream cheese, powdered sugar, and vanilla in a bowl. Mix until well blended and smooth. In small dollops, drop the cream cheese mixture on top of the unbaked brownie batter. Using the blade of a knife, drag the blade through the batter to make pretty designs and create a marbled effect.
5. Bake 22-24 minutes (mine took closer to 30). Allow to cool completely before serving. (I found that refrigerating them helped me cut them more neatly. If you don't intend to eat the entire pan at once, you should also consider keeping the leftovers in the fridge due to the cream cheese topping.)

Sunday, October 10, 2010

Happy Birthday to Me!

This year was a big birthday number for me. The big two zero. A pair of decades. Something without a "teen" at the end.

I dreaded it all year.

In my mind, turning 20 sucked. It signaled the end of my childhood, because there is almost no way to justify still calling yourself a kid once your age no longer ends in "teen." (All the way through age 19 I refused to allow anyone to call me an adult.)

But on my birthday I got my closure. It was a bittersweet farewell, but my childhood and I gracefully parted ways. I said goodbye and dulled the melancholic end by throwing the best cake party ever.

Birthday Cake 2 

My one stipulation for my birthday this year was that my friends allow me to bake my own cake. Now, knowing my somewhat tragic caketastrophic past, I was a little worried that I would make myself cry on my birthday from another cake upset. However, partly due to my apartment's culinary restraints (I own no 9-round pans, hand beaters, or candy thermometer...sigh) and partly due to my stress preventative measures (namely choosing and easy recipe), my cake turned out quite well!

I felt warmed from the inside as I sat around my coffee table with several of my good friends. There was laughing and smiling, awkward introductions and people trying to remember names, and many Happy Birthdays wished.

Sitting back for a moment, I reflected upon how great 20 really was. I have amazing friends that care about me, a roommate that is like a sister, an apartment I love, and even a really cool job. Thinking about all of this, I realized that all of these things are cool things about being an adult, not a kid. I'd never have a roommate in high school or be able to say that I rented my own apartment. I realized that I was excited for my adult life.

Birthday Cake

And then, of course, there was the cake. It was moist and flavorful, slightly dense but in the most delicate way possible, and satisfying in that homemade kind of way. While nervous about the frosting ("after all", I wondered, "how can sour cream make a good cake frosting?"), it turned out to be one of the most flavorful and creamy frostings I've ever encountered. Unlike a lot of frostings, the sweetness of this one was understated and allowed the chocolate (rather than the sugar) to take center stage, complimenting the subtle cake base with a degree of expertise.

All in all, out of the 20 I've had so far, this birthday definitely was the best, and the cake comes highly recommended, too.

For the recipe, please visit Smitten Kitchen. The source of my stress-free cake and countless hours of admiration. Thanks for the great birthday recipes, Deb!

Saturday, October 2, 2010

Daring Baker Challenge: Harry Potter Sugar Cookies

The September 2010 Daring Bakers’ challenge was hosted by Mandy of “What the Fruitcake?!” Mandy challenged everyone to make Decorated Sugar Cookies based on recipes from Peggy Porschen and The Joy of Baking.

HP Sugar Cookies

Guess who's always been intimidated by sugar cookies? Yeah, that would be me. It just all seemed so tricky - rolling out potentially sticky dough into shapes that may or may not spread out into unrecognizable shapes in the oven, and then trying to decorate them? Well that's just a whole new can of worms. Because who wants to eat an ugly cookie? Not me, thanks.

So there was definitely a lot of pressure on my shoulders (self inflicted, but still), but I rolled up the sleeves of my sweatshirt, put on my apron, and mentally put on my Daring Baker hat.

The host asked us to make cookies that represented September to us. The first thing that popped into my mind? Harry Potter! You may not know this, but the Harry Potter series and I have a very strong relationship. I've definitely lost track of how many times I've read each book.

HP Sugar Cookies 2

But the reason that Harry Potter reminds me of September is because each year, on September 1st, all of the Hogwarts students file onto the hidden Platform 9 3/4's and take the Hogwarts Express to start their term at school.

While I am still avidly waiting for my Acceptance Letter to Hogwarts, September makes me think of all the wonderful things JK Rowling has written about and how someday, yes someday, I'll finally get my letter by owlpost and be off to Hogwarts :)

As far as the edibility of my sugar cookies, they turned out quite well! Granted, they tasted like sugar cookies (not too unique), but eating something so adorable added to their likability quite a bit. Between munching on snitches, lightning bolts, Gryffindor shields, S.P.E.W. Hats, and Platform 9 3/4's signs, the plate of cookies disappeared as quickly as Hermione can answer a question in class.

And there you have it! My nerdiness at its prime, and delicious cookies to boot! Another successful Daring Baker's Challenge :)

Interested in joining Daring Bakers? Check out the recipe for Sugar Cookies and see other people's creations here.

Friday, September 10, 2010

Cocoa Brownies, A Success Story

Cocoa Brownies 2

So do you remember that ill-fated day when I attempted to make brownies from America's Test Kitchen? It was pretty embarrassing, let me tell you. You want to know something even more embarrassing? That post is the most viewed post on my blog. I think I'll just sink down really low in my desk chair and hope that the embarrassment will pass (a tactic that works wonders in class, by the way).

But I've never been one to submit to defeat. Even though my baking pride was wounded and I felt tragically incompetent, I knew that successful brownies were within my reach. Thousands upon thousands of other bakers have successfully made brownies from scratch, so why not me? I couldn't think of a good answer to that, and I therefore gathered my ingredients, preheated the oven, and tried again.

And guess what? I am proud to say that I succeeded. I . Made. Successful. Brownies.

...
WAHOOOOO!!!

*Ahem*
Sorry for the outburst, I'm just really excited about my delicious brownies. I got my recipe from Smitten Kitchen (wow, that's two in a row on my blog - I guess we all know who I like to go to for inspiration now...), and I admit that I was a little hesitant about making pure cocoa powder brownies without any actual melted chocolate in them, but I just went for it.

Cocoa Brownies

Unlike last time, I made sure I took them out even though they didn't look quite done, because I knew that over-baking was my downfall last time. I anxiously waited for them to cool so that I could cut one and figure out whether my second brownie endeavor was a failure or not. When I took my first bite, I knew I had made a winning batch. They had a satisfying chew to them and oh so much chocolaty flavor that a large, large glass of milk is definitely a must for consuming this dessert. In fact, these brownies were so good that my roommate pointed out something to me that I have no qualms about:

She said to me, "Anna, how many brownies did you make?" 
She held up the number 10. 
Continuing, she said, "How many did I eat?" 
She held up the number 1.
"And... how many are left?" Three.

After this conversation took place, I promptly ate two of the remaining three brownies. For dinner. Gosh they were good.

Cocoa Brownies 3

Recipe:
Adapted from Smitten Kitchen

Makes 25 smaller brownies (I halved my recipe, which is why I had 10)

10 tablespoons unsalted butter
1 1/4 cups sugar
3/4 cup plus 2 tablespoons unsweetened cocoa powder
1/4 teaspoon salt
1/2 teaspoon pure vanilla extract
2 large eggs, cold
1/2 cup all-purpose flour
2/3 cup walnut or pecan pieces (optional)

1. Position a rack in the lower third of the oven and preheat the oven to 325°F. Line the bottom and sides of an 8×8-inch square baking pan with parchment paper or foil, leaving an overhang on two opposite sides.
2. Combine butter, sugar, cocoa, and salt in a microwave-safe bowl. Microwave for 20 seconds at a time until butter is completely melted. Stir the mixture until it is smooth (it will look fairly gritty).
3. Stir in the vanilla. Add the eggs one at a time, stirring vigorously after each one. When the batter looks thick, shiny, and well blended, add the flour and stir until you cannot see it any longer, then beat vigorously for 40 strokes with the wooden spoon or a rubber spatula. Stir in the nuts, if using. Spread evenly in the lined pan.
4. Bake until a toothpick plunged into the center emerges slightly moist with batter, 20 to 25 minutes. Let cool completely on a rack.

Monday, September 6, 2010

Buttermilk Ice Cream

Buttermilk Ice Cream

When I figured out there was a way to make ice cream without the aid of an ice cream machine, I practically  sprinted to the nearest supermarket to buy heavy cream. You see, ice cream and I get along well - really well. Its cold, creamy texture combined with an infinite number of flavor combinations makes it so that I eat ice cream quite often. Quite often indeed.

There is an ice cream shop called Ici two blocks away from my apartment, and between the delicious, unique flavors, the homemade cones with heavenly chocolate in the tip, and the boy with the lovely smile who works there, a good part of my spending money goes toward buying gourmet ice cream.

However, seeing that I am needing to save my money for my upcoming semester in Rome (WAHOOOOO I'm going to Rome!!!), my Ici visits need to stop being a weekly biweekly thing. This is why this homemade ice cream making method has me all worked up.

Buttermilk Ice Cream 2

Now my first ice cream experiment was with a flavor that many of you may not appreciate at face value: buttermilk. Buttermilk, the tangy, sour liquid that is oh-so useful in baking, but definitely not for drinking straight out of the carton, isn't something many consider to be delicious in its own right. But when I saw a recipe for buttermilk ice cream on Smitten Kitchen's blog, I knew I had to try it.

And it was delicious.

It was tangy but sweet, delectably creamy, and each spoonful was completely and utterly satisfying. If you have ever tried creme fraiche ice cream (a flavor I get from time to time at Ici), it sort of tasted like that.

So how did I manage to make ice cream without an ice cream machine, you ask? Well, I'm so nice that I'm going to tell you:

How to make ice cream without a machine:
1. First, you make the recipe as you would normally do, but then put it in a shallow, high rimmed baking dish (which makes stirring the mixture easier). Chill the mixture in the fridge until it is thoroughly cold (mine took a few hours).
2. Move the dish to the freezer for 30 minutes. After 30 minutes, remove the tray and whisk vigorously for 2 minutes, making sure you incorporate the semi-frozen edges, too. Put back in the freeze for 30 more minutes and repeat. Then 30 more minutes, repeat.
3. After you have done this process 3 times (meaning that you've stirred it 3 times), put the tray in the freezer until the mixture has completely frozen, ideally overnight. You can then put your ice cream in a lidded container and enjoy to your heart's content!

Buttermilk Ice Cream 3

Recipe:
Adapted from Smitten Kitchen


2 cups heavy cream
1 1/4 cup sugar
8 large egg yolks
2 cups buttermilk
2 teaspoons vanilla
Pinch of salt

1. In a large, heavy saucepan, combine the heavy cream and one cup of sugar and bring to a simmer over medium heat.
2. In a large bowl, whisk egg yolks and remaining 1/4 cup of sugar.
3. Remove the cream mixture from the heat and drizzle a small amount into the yolks, slowly, and whisking constantly to keep the eggs from curdling. Do this a few more times to warm up the yolks before pouring the yolk mixture back into the cream, whisking constantly.
4. Cook over low heat until the mixture is thick enough to coat the back of a spoon. Strain the mixture and whisk in the buttermilk, vanilla, and salt. Cool completely and freeze. (If you have an ice cream maker, by all means use it. But if you don't, feel free to use the method I tried out - it worked wonderfully!)

Saturday, September 4, 2010

Lemon Tassies


Lemon Tassies

So uh... what the heck is a tassie? 

Good question. Luckily I have the answer... and by that, I mean Wikipedia has the answer. Ohhhh Wikipedia, how I adore you. Anyway, Wikipedia says... Tassie: A small tart or miniature pie.

Ah, that makes sense, considering that these Lemon Tassies are like baby pies that haven't grown up yet. I can just picture these tassies saying, "When I grow up, I want to be a big and strong Lemon Meringue pie!"

That being said, these tassies really don't taste anything like lemon meringue. To me, they tasted almost like lemon cheesecake bites, because of the cream cheese used in the filling. And perhaps it's because I didn't use enough zest, but they weren't quite lemony enough for me, either. But it's okay, baby tassies, I don't blame you - you still tasted delicious.

My one issue with this recipe, however, was that I ended up having WAY too much leftover filling. The crust was easy enough that I didn't mind mixing up some more dough, but making 24 more little pie crusts seemed way too tedious for my impatient mood. So instead of making 24 mini pies, I... MADE A PARENT PIE!

 Lemon Tassie Pie

Okay okay, yes, I do realize that I'm anthropomorphizing my baked goods. It's been a long week. But you've got to admit that if you saw a regularly sized pie next to 24 mini pies, you'd get some warm fuzzies inside, too. No? Oh... Well, just humor me, then.

Annnnyway... I've got some news for you: I liked the parent pie better. (Shh! Don't tell the tassies!) For some reason, the ratio of crust-to-filling just tasted better to me. You can go ahead and give the tassies a try, but if you want a quicker recipe, I'd just halve the filling recipe and make a large pie crust. Of course, if you want to double the crust recipe and make a tassie family, that sounds like a good option to me.

One more picture of the tassies, for cuteness's sake:

Lemon Tassies 2


Recipe:
Adapted from marthastewart.com

For the crust: 
5 tablespoons cold unsalted butter
1 cup all-purpose flour
3 tablespoons sugar
1 large egg yolk
1/2 teaspoon pure vanilla extract
1 teaspoon finely grated lemon zest
Pinch of salt 

For the filling (Halve these amounts if just making one batch of crust):
8 ounces cream cheese, room temperature
1/3 cup sugar
1 large egg
3 tablespoons finely grated lemon zest
1 tablespoon freshly squeezed lemon juice
1/2 teaspoon pure vanilla extract
  
1. Preheat the oven to 350 degrees with rack in upper third. Lightly butter a 24-cup mini-muffin pan (or a pie tin, if using); set aside. In a food processor fitted with a steel blade, combine the flour and butter. Pulse until mixture is the consistency of fine crumbs. Add the sugar, egg yolk, vanilla, lemon zest, and salt. Process until evenly incorporated and smooth; do not overprocess. 
2. If making tassies: divide the dough into quarters. Divide each quarter into 6 pieces. Shape into balls. Place each ball in a muffin cup; press down in the centers so that the dough fits the cups snugly. Set muffin pan on a baking sheet. If making one pie: press dough evenly in pan.
3. Bake until lightly browned all over and slightly darker at the edges, 15 to 20 minutes. Transfer baking sheet with muffin pan to a wire rack to cool. 
4. Make the filling: In an electric mixer fitted with the paddle attachment, beat cream cheese, sugar, egg, lemon zest, lemon juice, and vanilla until completely smooth. For tassies: using a 1/4-ounce ice cream scoop, fill the cooled crusts. Bake until filling is set and just beginning to color at the edges, 10 to 12 minutes. Transfer muffin pan to a wire rack. Let cool completely before serving. The tassies may be stored in an airtight container, refrigerated, for up to 3 days.

Sunday, August 29, 2010

Sunday Tea Party (with scones, of course)

Wow. It's been quite some time since I last posted. I wish I could fool you all into thinking that my head is hung in shame and that my feeling of guilt has been plaguing me since I last posted, but guess what? That would be a lie.

Don't get me wrong - I enjoy blogging, taking pictures of food, baking, and well let's be honest: I like eating, too. But this summer I was a camp counselor where computer access was limited to 5 minutes here or there on my daily 2 hour break, and this isn't even taking into consideration where on earth I would find time to bake things for this blog anyway. Needless to say, baking blogs weren't one of my priorities.

CW Thurs 079 

But let me take this time to tell you all of the things that DID happen this summer that will stay with me for the rest of my life:

- I canoed for the first time ever and made up songs to commemorate my groups extremely leaky canoe
- I made a hat of stegosaurus spikes and wore it all day long. And got many compliments, thank you.
- I made better friends in the course of three months than I thought was possible
- I ate lots of smores. Lots and lots and LOTS of smores (which taste suprisingly good with peanut butter. Give it a try sometime).
- I conquered my fear of horses and spiders (well... sort of)
- I saw a family of racoons
- I stopped being intimidated by my scary co-workers

CWO Sun 093

However, camp is over for the summer, and despite my week of post-camp depression, the time has come to return to school, restart my real-world life, and, of course, begin baking once again.

camp session 1 closing campfire 041

Today was such a lazy Sunday - I stayed in bed reading until 10 and had absolutely no qualms about it. The rest of the day I lazed about in the same fashion, and it wasn't until around 3 that I started getting restless to do something productive. That's when the brilliant idea hit me: TEA PARTY! (And not the political kind. Let's not even open that can of worms today...)

Now, here's what I envision when I think of tea parties: frilly dresses, bouquets of flowers, dainty teacups, and beautiful platters of delectable pastries.

Well, considering that this tea party was taking place in the teensy apartment of two college students, we had to make a few modifications. Instead of dresses we wore sweats (I suppose we could have worn dresses, but I'm not going to deny that sweats are just like... ten times comfier), we put trimmed flowers from our yard in an old peanut butter jar, we drank teabag-tea from coffee mugs, and had old fortune cookies from last night's takeout. Pretty legit substitutions, I think, right?

Err... Let's just skip to the highlight of the ragtag tea party, shall we?

THE SCONES!!!

Orange Craisin Scones

I made orange cranberry scones and they were absolutely amazing. The recipe called for buttermilk, and it gave it this slightly tangy flavor that matched so well with the sour-sweetness of the dried cranberries. Flavor aside, the texture of these scones was what I've always expected a scone to have: a nice, crusty, flaky shell and a moist and fluffy inside. Perfection, scone-ified.

All in all, I thoroughly enjoyed our little tea party. We talked about life while drinking tea and eating scones. I felt very sophisticated (wouldn't you?). After we had drained our cups and finished the last crumbs of our scones, it was time to get back to reality: cleaning up the apartment and dredging through homework. Ah well, such is life; at least until the next time you have a tea party.

Orange Craisin Scones (2)

Print This Recipe!

Recipe:
Adapted from marthastewart.com

1 1/2 cups all-purpose flour, spooned and leveled
3 tablespoons sugar
2 1/2 teaspoons baking powder
1/2 teaspoon baking soda
1/4 teaspoon salt
1 teaspoon finely grated orange zest
5 tablespoons cold unsalted butter, cut into small pieces
1/2 cup dried cranberries
2/3 cup low-fat buttermilk, plus 1 to 2 tablespoons more if necessary

1. Preheat oven to 400 degrees. Line a baking sheet with parchment or waxed paper. In a large bowl, stir together flour, sugar, baking powder, baking soda, salt, and orange zest.
 2. With a pastry blender or two knives, cut butter into flour mixture until it resembles coarse meal. Stir in dried cranberries.
 3. Make a well in the center of the mixture. Add buttermilk, and stir until just combined; do not overmix. Use a little more buttermilk if dough is too dry to work with.
 4. Transfer dough to a lightly floured surface; shape into an 8-inch round. Transfer to baking sheet. Cut circle into 8 wedges; space them 1/2 inch apart (to prevent sticking, dust knife with flour). Bake until golden, 18 to 20 minutes.

Sunday, June 27, 2010

Daring Baker Challenge: Chocolate Mousse Pavlovas

The June 2010 Daring Bakers’ challenge was hosted by Dawn of Doable and Delicious. Dawn challenged the Daring Bakers’ to make Chocolate Pavlovas and Chocolate Mascarpone Mousse. The challenge recipe is based on a recipe from the book Chocolate Epiphany by Francois Payard.


This was my very first Daring Baker's challenge, and I was nervous and excited to trying something so challenging for my beginning baking level. I admit that I was so geeked up about trying my first challenge, that I waited anxiously at my computer on the recipe release date and kept refreshing until the June Challenge tab popped up. I rushed to print out the recipe, and then read through it thoroughly to see what it would entail.


Then, of course, my giddiness ran into a snag: Mascarpone cheese? Cups upon cups of heavy cream? Those weren't things I could find cheaply at the local market. I mentioned to my mom that I would need a ride to the store to buy these things, and she said she would be willing to do it later. I agonizingly waited for a whole entire week. It was excruciatingly painful, let me tell you, but I finally managed to get the the supermarket and I practically sprinted to the dairy aisle to find my ingredients.


Then I baked. And baked and baked and baked, because this recipe was really involved. There were 3 separate components to make, and each one was outside the realm of my prior baking experience. First off was the chocolate meringue, which went surprisingly well. I was a little worried that my oven wouldn't be able to have a temperature low enough for it (it stops at 250 F), but it was fine. And, of course, piping the pavlova bases out was a lot of fun. I made little meringue kisses, too, because I had a feeling my brothers would like those.


While the meringue was baking, it was time to make the mousse. Never in my life have I eaten mousse, let alone make it, so I was pretty nervous. But the recipe for the mousse started out with the most wonderful ingredient that I could ever ask for: an entire bar of 72% cacao chocolate. Amazing.


I melted the chocolate and added the lemon zest (which, by the way, I would omit next time, because it gave the mousse a gritty texture and didn't add that much notiecable flavor) and Grand Marnier (I always feel so fancy when I say that with a French accent. Give a try, you know you want to).


After whipping the egg whites for the meringue, whipping the mascarpone cheese with the heavy cream didn't seem quite as daunting. As a result, the mousse went off most successfully.


The creme anglais topping also went down without a hitch, and it just so happened to be the most wonderful thing I've ever tasted in my life. Creme Anglais isn't specific to this recipe, so if you haven't ever tried it, please please PLEASE make some. It's so freaking delicious. Unfortunately, I didn't buy quite enough Mascarpone cheese to make the official challenge "Mascarpone Cream Topping", but simply drizzling the creme anglais on top of the finished pavlovas tasted excellent, too.

And that's it! I'm happy to say that my very first Daring Baker's Challenge was a complete and utter success! The one thing I would caution about if anyone out there wants to try it, is that I halved all the recipes, and still ended up with too much of everything! The meringues disappeared quickly enough, but there was so much leftover mousse and creme anglais that despite my best efforts (and believe you me, I definitely tried to eat as much as a could!), I still had to throw some of it away. If I make this again, I would use the original recipe amount for the meringue, but halve the recipes for the mousse and creme anglais.

If you do decide that this recipe looks so delicious that you want to try it out, head on over to The Daring Kitchen, where the recipe will be posted, along with pictures of other Daring Bakers' Chocolate Pavlovas!

Tuesday, June 15, 2010

Anna Banana Bread


So my little brothers can be pretty funny guys. Real comedians, you know? The longstanding joke in the family: "Look under there!" ("Under where?") "Haha you said underwear!"

Hilarious, I know.

My mom is also pretty funny, but more so because of her quirky habits. For example, she insists on storing black bananas in the freezer with the peels in tact ("You can use them to bake us something, Anna!" she says). How she expects me to remove the frozen peels, I'll never know. This time, though, I noticed the browning bananas on the counter before she could freeze them, so I scooped them up, and decided to make banana bread. Operation Freeze-Bananas: Thwarted! (Let's play some heroic music in the background right here).

How on earth do the anecdotal stories about my insane little brothers and my quirky mom fit together, you ask? Well, when your name happens to be Anna, and this rhymes oh so well with the word banana, things sort of run their own course. Upon hearing that I was making banana bread with the rescued bananas, my youngest brother gasped, giggled, and then said, "ANNA BANANA BREAD!!! Mom, let's eat some Anna Banana Bread!" Unsurprisingly, this pun remained popular until the entire loaf was gone.

Being the good big sister that I was, I smiled and laughed every time my brothers made this joke, but when I make something with bananas in the future, I'm definitely not telling them that there's bananas in it.

Print This Recipe 

Recipe:
Adapted from The Joy of Cooking

1 1/3 cups all-purpose flour
3/4 teaspoon salt
1/2 teaspoon baking soda
1/4 teaspoon baking powder
1/3 cup unsalted butter, softened
2/3 cup sugar
2 large eggs
1 cup mashed very ripe banana (about 2)
1/2 cup chopped walnuts or pecans (optional)

1. Preheat over to 350 F. Grease an 8 1/2 x 4 1/2 inch loaf pan.
2. Whisk together thoroughly flour, salt, baking soda, and baking powder. In a large bowl, beat butter and sugar on high speed until lightened in color and texture, 2 to 3 minutes. Beat in the flour mixture until blended and the consistency of brown sugar. Gradually beat in eggs. Fold in banana and walnuts until just combined.
3. Scrape the batter into the pan and spread evenly. Bake 50 to 60 minutes, until a toothpick inserted in the center comes out clean. Let cool 5 to 10 minutes before unmolding to cool on a rack.

Thursday, June 10, 2010

Lemon Poppy seed Cookies


Lemons and poppy seeds are a quintessentially classic combination, but only for muffins, cakes, breads - that sort of thing. The poor cookie category seemed woefully neglected. Why? Why on earth would two such wonderful companions fail to enter into the cookie realm?

But guess what? I found a cookie that brings lemons and poppy seeds into pure, crunchy, cookie bliss.

Usually I'm not a crunchy cookie fan, and I admit that these cookies took me a while to warm up to, because they are very crunchy. Wafer-thin and crispy, these lemony cookies were a far cry from the chewy cookies that I normally prefer, but as I sat munching one, I thought about it: if these cookies were chewy, it would be weird. The delicate crunch works well with the tangy, dainty flavor of these cookies, and a heartier "chew" would just throw all of that off.


When I started this recipe, the first step really intrigued me. It involved reducing 1/4 cup of lemon juice in a pan and then adding 1 stick of butter. This gave the cookies a really intense lemon flavor. Side note: despite two wonderful things (lemons and butter), don't be tempted to taste this. It's really gross. I'll let you guess how I figured this part out...


Aside from the reduction step, the rest of the recipe is a pretty straightforward cookie recipe - cream the remaining butter with the sugar, add egg and lemon butter mixture, add vanilla and zest, and then the dry ingredients and poppy seeds. I found that the dough was really loose, but it made for good cookies still, so don't worry if it looks more like a cross between cookie and cake batter than cookie dough.

The last step of this recipe was to roll spoonfuls of dough in a sugar-lemon zest combination, and this made the outside of the cookie have a beautiful sheen, and a very tangy first bite. The zest sort of infuses with the sugar so everything tastes lemony, and it's awesome. One word of caution: the zest makes the sugar rather moist and clumpy, so rolling out the last few cookies can be difficult (too much sugar wants to stick to the dough).


And tah dah! Beautiful, lemon poppy seed cookies! But can you tell from this picture what I forgot? I was such an eager beaver to get these babies in the oven that I didn't sprinkle poppy seeds on top - doh! I remembered for the last batch, but the rest of the cookies were woefully naked.

Print This Recipe 

Recipe:
Adapted from MarthaStewart.com 

1/4 cup fresh lemon juice, plus 3 1/2 teaspoons freshly grated lemon zest (2 to 3 lemons)
2 sticks unsalted butter (8 ounces)
2 cups all-purpose flour
1 teaspoon baking powder
1/2 teaspoon salt
1 1/2 cups sugar
1 large egg
2 teaspoons vanilla extract
1 tablespoon poppy seeds, plus more for sprinkling

1. Preheat oven to 375 F. Bring lemon juice to a simmer in a small saucepan over medium heat; cook until reduced by half. Add 1 stick of butter; stir until melted.

2. In a medium sized bowl, whisk together flour, baking powder, and salt. In a large bowl, cream remaining stick of butter and 1 cup of sugar on medium speed. Mix in egg and lemon butter. Mix until pale, about 3 minutes. Mix in vanilla and 2 teaspoons zest. Mix in flour mixture and poppy seeds.

3. Stir together remaining 1/2 cup sugar and 1 1/2 teaspoons zest. Roll spoonfuls of dough into 1 1/2-inch balls; roll them in sugar mixture. Place 2 inches apart on baking sheets. Press each with the flat end of a glass dipped in sugar mixture until 1/4 inch thick. Sprinkle with poppy seeds. (I found that 1-inch balls worked better than 1 1/2-inch. The cookies baked more evenly that way)

4. Bake until just browned around bottom edges, 10 to 11 minutes. Transfer to wire racks; let cool completely.

Friday, June 4, 2010

Homemade Marshmallow Fondant


Up until about two weeks ago, I had no idea what fondant was. I knew that it was used for decorating cakes, and I also knew that it didn't taste so great, but further than that I was clueless. In order to clear up my ignorance on the subject, I decided that the perfect way to learn about it was to make it!

My conclusion? Fondant is a sticky, gooey mess that tastes way too sweet, but it does indeed make things look really pretty. Because of how sickly-sweet it tastes, I don't think I'll be making it again anytime soon, but it was fun to add cute decorations to cupcakes as well as use it to create the spikes of my Dinosaur Cake.

I used a marshmallow fondant recipe that is pretty popular online. Basically you melt a bag of marshmallows in the microwave or on the stove, and then add tons and tons on powdered sugar until it turns into a manageable dough. Add food coloring and shape it or roll it out flat, and voila! Instant cuteness for baked goods.


Recipe:
Adapted from Wilton's Marshmallow Fondant

16 ounces marshmallows
2-5 tablespoons water 
8 cups confectioner's sugar
1/2 cup vegetable shortening

1. To make marshmallow fondant, place marshmallows and 2 tablespoons of water in a microwave-safe bowl. Microwave 30 seconds on high; stir until mixed well. Continue microwaving 30 seconds more; stir again. Continue until melted (about 2 1/2 minutes).

2. Place 3/4 of the confectioners' sugar on top of the melted marshmallow mixture. Fold sugar into marshmallow mixture. Place solid vegetable shortening in easily accessed bowl so you can reach into it with fingers as you are working. Grease hands and counter generously; turn marshmallow mixture onto counter. Start kneading like you would dough. Continue kneading, adding additional confectioners' sugar and re-greasing hands and counter so the fondant doesn't stick. If the marshmallow fondant is tearing easily, it is too dry; add water (about 1/2 tablespoon at a time) kneading until fondant forms a firm, smooth elastic ball that will stretch without tearing, about 8 minutes.

3. It's best to allow Marshmallow Fondant to sit, double-wrapped, overnight. Prepare the fondant for storing by coating with a thin layer of solid vegetable shortening, wrap in plastic wrap and then place in resealable bag. Squeeze out as much air as possible. Marshmallow Fondant will keep well in refrigerator for several weeks.

4. When not working with fondant, make sure to keep it covered with plastic wrap or in a bag to prevent it from drying out. When ready to use, knead fondant until smooth. Roll out fondant 1/8 in. thick.
To color fondant: If you need to tint the entire batch of fondant, add a little icing color to the melted marshmallow mixture before adding confectioners' sugar. For smaller amounts of tinted fondant, add icing color to portions of fondant as needed.

Wednesday, June 2, 2010

Mexican Hot Chocolate Cookies


Have you ever wanted to try something so badly that it almost pains you when you can't get your way? Well, that's how I felt when decided I wanted to try to make these cookies. My  interest in making Mexican Hot Chocolate Cookies started a few months ago, but I couldn't find the perfect recipe. I searched and searched, but nothing seemed to be doing it for me. Yesterday, while browsing Martha Stewart's website for the first time in my life (sorry to all the Martha haters out there), I finally found it.

This recipe is sort of like a chocolate snickerdoodle - it requires the balls of dough to be rolled in a cinnamon-sugar mixture before baking, but there's a twist: add chile powder. I tried half of my cookies without the powder and half with it, because I was worried it would be too spicy for my mom (she's a super spice weenie). My conclusion? The chile powder is totally, TOTALLY worth it. It doesn't add any noticeable spiciness, but it does add a little, almost undefinable, flavor (unless you know the ingredient) that takes this cookie to the next level.

My mother, who is a pretty tough critic, has proclaimed this her new favorite cookie, which should prove to you just how awesome this recipe is.

Recipe:
Adapted from MarthaStewart.com

2 1/4 cups all-purpose flour
1/2 cup unsweetened cocoa powder
2 teaspoons cream of tartar
1 teaspoon baking soda
1/2 teaspoon salt
1 cup (2 sticks) unsalted butter, softened
1 3/4 cups sugar
2 large eggs
2 teaspoons cinnamon
1/2 teaspoon chile powder (optional)

1. Preheat oven to 400 F. In a medium bowl, sift together flour, cocoa powder, cream of tartar, baking soda, and salt. In a large bowl, beat butter and 1 1/2 cups sugar on medium speed until light and fluffy, about 2 minutes. Add eggs and beat to combine. With mixer on low, gradually add flour mixture and beat until combined.
2. In a small bowl, combine remaining 1/2 cup sugar, cinnamon, and chile powder (if using). Using heaping tablespoons, form balls of dough and roll in cinnamon-sugar mixture. Place, about 3 inches apart, on parchment-lined baking sheets. Bake until cookies are set in center and begin to crack, about 10 minutes.

Friday, May 28, 2010

Caramel Pudding

So I'm going to say it upfront: as I sit writing this post, I am definitely eating the last of the caramel pudding for my lunch. Do I feel guilty about not eating real food for my midday meal? Hmm... no. Is it so delicious that I'm saying "yum" out loud to myself? The answer to that would be a resounding yes.


When I saw this recipe posted on Joy the Baker, I knew I had to try it. Not only did it look delicious and simple, but I also thought that it might make up for the complete Chocolate Blancmange fail I had a few weeks ago. Also, I have an ardent love for melting sugar (it never ceases to excite me when the solid turns into a gooey, syrupy liquid), so I definitely wanted to have an excuse to melt more sugar.

Anyway, the recipe went down without a hitch, and in my opinion, the end result was absolutely delicious. My mom thought that the texture was a little too stiff for her liking, and that the flavoring was more like butterscotch than caramel, but I didn't mind - it meant more for me! (I may not have browned the sugar long enough, too.) In all honesty, though, she had a good point - this recipe sort of reminded me of flan because of the burnt-sugar taste and the texture.


Oh man - isn't melted sugar awesome??! Sorry - you've probably all seen melting sugar before, but I just wanted to include these pictures because it's such an awesome phenomenon. Solid to white syrup to brown syrup - so cool!


I admit that the one time I was concerned during the recipe was when I added the cold milk to my wonderfully brown syrup. It turned into a rock hard blob on the end of my whisk. Dang. But not to fear! Once you begin to heat up the milk, the blob will remelt and stop holding your whisk hostage.


See? Ta dah! Whisk = clean!


Recipe:
From Joy... who got it from Smitten Kitchen. (see how many people think this recipe is awesome enough to post?)

Serves 8

4 cups whole milk
6 tablespoons cornstarch
2 teaspoons pure vanilla extract
1/4 teaspoon salt
1 cup sugar

coarse sea salt and whipped cream for topping

In a small bowl, whisk 1/2 cup of the milk with the cornstarch, vanilla and salt until smooth. Set aside. In a large saucepan, combine the sugar with 6 tablespoons of water and bring to a boil. Cook over moderately high heat, undisturbed, until a deep amber caramel forms, about 8 minutes.  Be sure not to stir the cooking sugar.  If anything, feel free to swirl the pan around a bit.   Be patient but watch the stove like a hawk as caramel changes color quickly. 

Remove from the heat. Very gradually whisk in the remaining 3 1/2 cups of milk.  As you begin whisking it in, the caramel will get very dark and begin to seize with the cold milk.  Not to worry… everything will work out.
Return the pot to the stove and whisk over moderate heat until the caramel has dissolved again. Once again, watch this closely as the milk will foam up quickly as it comes to a simmer. Simmer over moderately low heat until the mixture thickens  just slightly and deepens in color, about 10 minutes.

Gradually whisk the cornstarch mixture into the caramel. Cook again over moderate heat, stirring, until the pudding thickens, about one minute.  The pudding may look and feel pretty loose, but will thicken nicely when chilled in the fridge.

Strain the pudding in a fine strainer set over a large measuring cup; if you want, you can skip this and nothing terrible will happen. Scrape the pudding into eight 1/2-cup ramekins and refrigerate until chilled and set, about 2 hours.

To avoid a pudding skin press a piece of plastic wrap onto the surface of each pudding dish as it chills.  Top with a generous sprinkle of coarse sea salt and whipped cream.