Showing posts with label flops. Show all posts

Monday, May 31, 2010

Cake-tastrophe Part 2

After my homemade chocolate cake disaster, I thought that the universe was too nice to allow for anymore mishaps in the kitchen for a while. However, I still took extra precautions when I made my store-bought cake mix. I wasn't taking any chances - I oiled my pans really well and double checked everything from measurements to the oven temperature.

Apparently that wasn't enough.

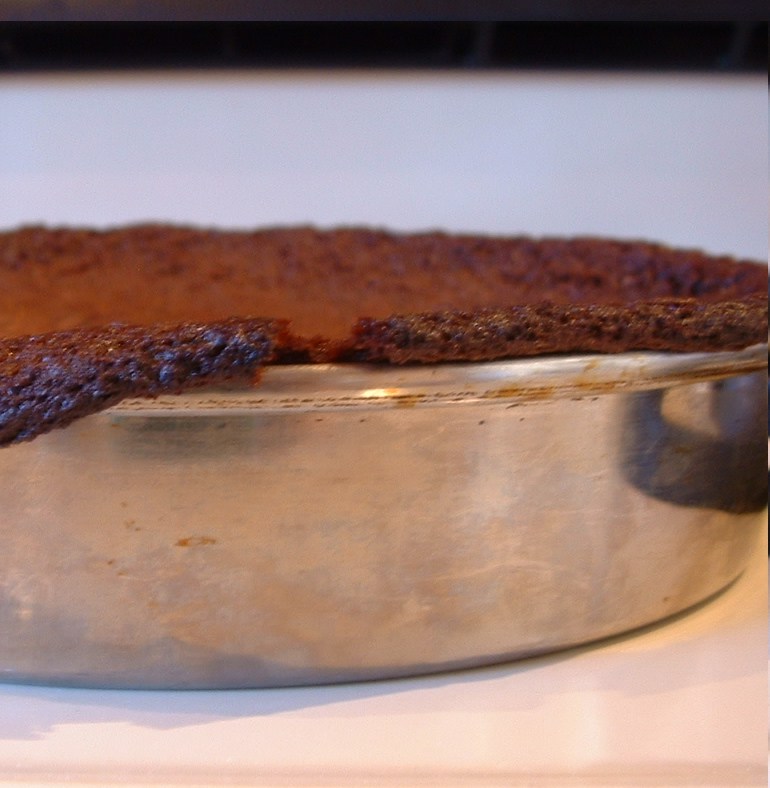
Baking the cakes went fine, but once they were cooled and I tried to take them out of their pans, they wouldn't budge. I started panicking so I shook and shook and shook the pan (looking back, this probably wasn't the best strategy... Scratch that. It definitely wasn't the best strategy). The cake finally gave into my aggressive shakes, but in retaliation, it came out in two pieces: the outside, and the middle. Ughhhhhh.

The other pan wasn't much better, but it was all that I had to work with, given that the birthday party was in T-minus 4 hours. I decided that with the aid of more frosting than was possibly decent, I would try to construct my dinosaur cake.

After the first layer of pink frosting was applied, my mutant dinosaur looked like it had some prehistoric skin disease, because the crumbs from the cake mixed with the frosting. Grrreat, my brother was going to have a cake that looked like a sickly animal.


I hadn't given up hope quite yet, though. I remembered reading in the Joy of Cooking that if you stick the cake in the fridge for a while and then add more frosting, the crumbs will stick to the first layer (the crumb layer), and leave the second one clean. I tried this, and it worked like magic. I was in awe of the power of a crumb layer, and my diseased dino only looked slightly afflicted now - definitely good enough to serve at a 5-year-old's party.

I used the fondant I made from scratch to make the eyes and spikes, and in the end, my brother loved it. It may not have been the cake I was expecting when I first conceptualized it, but I was still pretty gosh darn proud of my effort.

Sunday, May 30, 2010

Cake-tastrophe Part 1

Yesterday was my 5-year-old brother's birthday and, being the enthusiastic baker that I am, I volunteered to make the birthday cake. My brother told me he wanted a dinosaur cake, but not just any dinosaur cake - he wanted a pink dinosaur. It made my day when he said that.

I decided to make a chocolate devil's food cake from scratch, and then shape it into a dinosaur and cover it with pink frosting. Sounds simple enough, right? Well, let's just say that the beautiful dinosaur I had envisioned was never quite realized, and it took many, many tears to get the mediocre final result. I never understood why someone would cry over their baking disasters, but I can fully say that now I completely empathize with anyone frustrated to the point of tears.

For my first attempt, I chose a recipe from a cookbook that called for buttermilk and cake flour. Seeing how I had neither, I found substitutions that seemed legit - regular milk plus lemon juice for the buttermilk (so it would curdle), and all-purpose flour minus a few tablespoons for the cake flour. I think that these two things combined are what contributed to the disaster...

*Warning, the following images contain horrific views of mangled cake.*


As you can see, the cake didn't rise. Instead, it caved in halfway through baking, but still decided to spill over the sides. Pieces dripped into the abyss of the oven's depths, burned, and made the whole house smell like burnt chocolate. Lovely.

Even at this point, I had hope (feel free to start laughing at my bright-eyed optimism anytime now). I let the cakes cool in the pans, certain that even though they looked ugly, they could be salvaged and turned into a dinosaur cake with the help of copious amounts of frosting. When I turned them out onto a plate, however...


...they looked like a pile of mud. What should have been the height of a two-layer cake instead resembled a mud-pie that my brother would make in the backyard. Yeah... definitely no way that I would be able to turn that into a dinosaur.

I finally resorted to trudging down to the store and buying a boxed cake mix (the baker inside me died a little), and that turned into a whole other cake disaster (stay tuned for Part 2 tomorrow).

The one good thing from all of this is that my flop cake tastes delicious. It's so chocolaty and rich that it's already halfway gone, despite its ugly appearance. This experience definitely showed me that I still have quite a way to go on my baking journey, but it's a lesson I'm glad I learned. I guess I'll just have to try again for the next birthday cake, and hopefully that one will go a little better.

Sunday, May 16, 2010

Recipe Review: America's Test Kitchen Brownies

America's Test Kitchen is my new favorite show; it even trumps 30 Rock, which is saying something because I LOVE Tina Fey. Through a two-day marathon of watching episodes online, I think I've learned more about cooking than I would have ever learned by looking things up on Wikipedia (my love for Wikipedia is also very deep - just don't tell my professors that).

After watching a gajillion episodes, I decided it was time to take my new-found inspiration to the kitchen and make something I've never tried to make before, and my sights landed on the ever-decadent chocolate brownie.

The reason that I've never made them before is because my mom always just got the box mixes and discouraged me from trying to make them from scratch. She said the "boxes were better." Well, just because she made this claim didn't mean that I believed her. (Although I'm learning more everyday about how many things my mom is right about: bring a sweater everywhere, take vitamins, get enough sleep... the list is never-ending. But in the case of brownies, I still thought she was terribly wrong.)

So today, I put two and two together: if my mom says that making good brownies from scratch is difficult, and America's Test Kitchen perfects difficult-to-perfect recipes - gasp! - why don't I make America's Test Kitchen Brownies?!


Making the brownies was not too difficult. I made sure I had everything ready to go before I started, because some of the steps were somewhat time-sensitive, but I double-checked everything in the recipe so I'm fairly confident that I got everything correct.

Even with all of my careful recipe-reading and ingredient measuring, these brownies just didn't work for me. When I took them out of the oven, the insides were still really gooey and looked undone. I put them back in the oven for a fairly substantial amount of time, and this gooey appearance did not go away. I ended up putting them in the oven for so much longer that they turned out really, really chewy (and not in a good way) and tough around the edges - I could barely get the knife through them when they cooled completely. Perhaps if I took them out of the oven at the recommended time they wouldn't be so tough, but I'm pretty sure the insides wouldn't have been done if I had followed that course of action.

I'm not going to lie - I was pretty disappointed that the first recipe I tried from my new cooking idols turned out to be a flop. But I'll try more of their recipes before I solidify my opinion about them. In the meantime, I'm still on the search for an excellent brownie recipe so that I can prove to my mom that homemade is better!

In case you want to try it for yourself (maybe you'll have better luck than me), here's the recipe:

Chewy Brownies:
From America's Test Kitchen

INGREDIENTS

1/3cup Dutch-processed cocoa
1 1/2teaspoons instant espresso (optional)
1/2cup plus 2 tablespoons boiling water
2ounces unsweetened chocolate , finely chopped
4tablespoons (1/2 stick) unsalted butter , melted
1/2cup plus 2 tablespoons vegetable oil
2large eggs
2large egg yolks
2teaspoons vanilla extract
2 1/2cups (17 1/2 ounces) sugar
1 3/4cups (8 3/4 ounces) unbleached all-purpose flour
3/4teaspoon table salt
6ounces bittersweet chocolate , cut into 1/2-inch pieces

INSTRUCTIONS


  1. 1. Adjust oven rack to lowest position and heat oven to 350 degrees. Referring to directions in Making a Foil Sling (related), make sling using the following steps: Cut 18-inch length foil and fold lengthwise to 8-inch width. Fit foil into length of 13 by 9-inch baking pan, pushing it into corners and up sides of pan; allow excess to overhang pan edges. Cut 14-inch length foil and fit into width of pan in the same manner, perpendicular to the first sheet (if using extra-wide foil, fold second sheet lengthwise to 12-inch width). Spray with nonstick cooking spray.
    2. Whisk cocoa, espresso powder (if using), and boiling water together in large bowl until smooth. Add unsweetened chocolate and whisk until chocolate is melted. Whisk in melted butter and oil. (Mixture may look curdled.) Add eggs, yolks, and vanilla and continue to whisk until smooth and homogeneous. Whisk in sugar until fully incorporated. Add flour and salt and mix with rubber spatula until combined. Fold in bittersweet chocolate pieces.
    3. Scrape batter into prepared pan and bake until toothpick inserted halfway between edge and center comes out with just a few moist crumbs attached, 30 to 35 minutes. Transfer pan to wire rack and cool 1½ hours.
    4. Using foil overhang, lift brownies from pan. Return brownies to wire rack and let cool completely, about 1 hour. Cut into 2-inch squares and serve.