Showing posts with label cookies. Show all posts

Saturday, October 2, 2010

Daring Baker Challenge: Harry Potter Sugar Cookies

The September 2010 Daring Bakers’ challenge was hosted by Mandy of “What the Fruitcake?!” Mandy challenged everyone to make Decorated Sugar Cookies based on recipes from Peggy Porschen and The Joy of Baking.

HP Sugar Cookies

Guess who's always been intimidated by sugar cookies? Yeah, that would be me. It just all seemed so tricky - rolling out potentially sticky dough into shapes that may or may not spread out into unrecognizable shapes in the oven, and then trying to decorate them? Well that's just a whole new can of worms. Because who wants to eat an ugly cookie? Not me, thanks.

So there was definitely a lot of pressure on my shoulders (self inflicted, but still), but I rolled up the sleeves of my sweatshirt, put on my apron, and mentally put on my Daring Baker hat.

The host asked us to make cookies that represented September to us. The first thing that popped into my mind? Harry Potter! You may not know this, but the Harry Potter series and I have a very strong relationship. I've definitely lost track of how many times I've read each book.

HP Sugar Cookies 2

But the reason that Harry Potter reminds me of September is because each year, on September 1st, all of the Hogwarts students file onto the hidden Platform 9 3/4's and take the Hogwarts Express to start their term at school.

While I am still avidly waiting for my Acceptance Letter to Hogwarts, September makes me think of all the wonderful things JK Rowling has written about and how someday, yes someday, I'll finally get my letter by owlpost and be off to Hogwarts :)

As far as the edibility of my sugar cookies, they turned out quite well! Granted, they tasted like sugar cookies (not too unique), but eating something so adorable added to their likability quite a bit. Between munching on snitches, lightning bolts, Gryffindor shields, S.P.E.W. Hats, and Platform 9 3/4's signs, the plate of cookies disappeared as quickly as Hermione can answer a question in class.

And there you have it! My nerdiness at its prime, and delicious cookies to boot! Another successful Daring Baker's Challenge :)

Interested in joining Daring Bakers? Check out the recipe for Sugar Cookies and see other people's creations here.

Tuesday, June 22, 2010

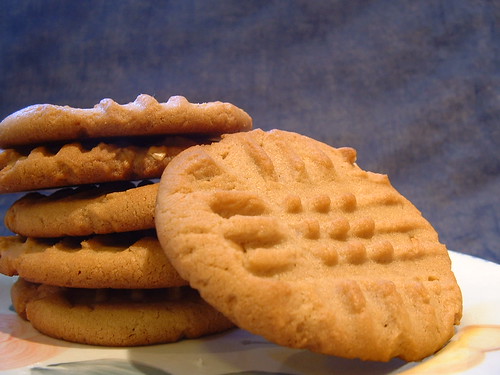
Peanut Butter Cookies, Perfected


In my family, there is one cookie that I make more than anything else in the kitchen. When I'm home, I'd hazard to guess that I make peanut butter cookies at least twice a month. I make these cookies for my stepfather, because they are his absolute favorite cookie. It's sort of nice, because every birthday, Christmas, and Father's Day, I always know at least one of my gifts to him will be: a nice, big batch of peanut butter cookies.

And this Father's Day, I'm proud to say that through many many many batches of peanut butter cookies I've made over the years, I've finally perfected the recipe. Every time I make the cookies, I make some changes to see what will happen (I'm not one who likes repetitiveness in baking, so tinkering with the recipe a little bit keeps me sane).


Before my changes, the cookies often came out hard and crunchy - a texture that I definitely don't approve of for most cookies. But now, ahhh but now... they have a wonderful, crumbly, buttery crunch, and each bite has a peanut buttery richness to it that I just couldn't achieve with the original recipe.

So here is the recipe that has been years in the making. Just... don't tell my stepfather I made changes, because he's a die-hard fan of using the original recipe from Joy of Cooking. We actually keep a dreadfully old, falling apart edition of the book (even though we have a clean, new version), because he says that it's the only recipe worth making. One of these days I'll just cut the recipe out and recycle the rest of the tattered pages, but until then, I'll continue to turn to page 658 (a page known by heart) and make my mental modifications, which I will put into writing here.


Print This Recipe!

Recipe:
Adapted from the Joy of Cooking

3/4 cup brown sugar
1/4 cup white sugar
1/2 cup butter, softened
1 large egg
1 cup peanut butter (try to get unnatural stuff like Skippy. The added sugar and the homogenized consistency helps it turn into a better cookie!) 
3/4 teaspoon salt
1/2 teaspoon baking soda
1 1/2 cups sifted all-purpose flour
1/2 teaspoon vanilla extract

1. Preheat oven to375 F.
2. Sift brown sugar and white sugar. Beat butter in a large bowl until soft. Add sugars until mixture is creamy. Beat in egg, peanut butter, salt, and baking soda. Add sifted flour and vanilla..
3. Roll dough into large balls (about 2 inches). Place on a greased cookie sheet and press balls flat with a fork. (The larger cookie size helps the texture to be softer, so don't make smaller cookies unless you want crunchy cookies. I usually get around 20 large cookies from the 2-inch balls)
4. Bake for 10-12 minutes, until slightly golden brown around the edges.

Thursday, June 10, 2010

Lemon Poppy seed Cookies


Lemons and poppy seeds are a quintessentially classic combination, but only for muffins, cakes, breads - that sort of thing. The poor cookie category seemed woefully neglected. Why? Why on earth would two such wonderful companions fail to enter into the cookie realm?

But guess what? I found a cookie that brings lemons and poppy seeds into pure, crunchy, cookie bliss.

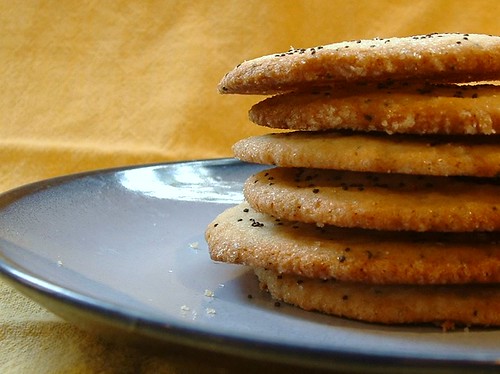
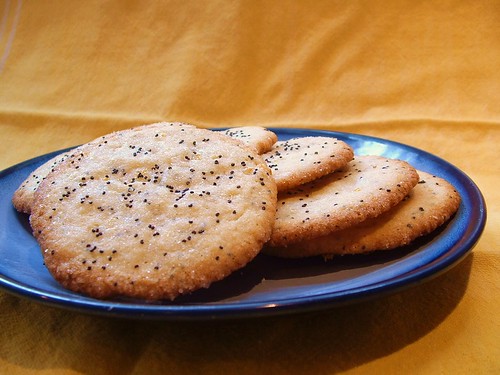
Usually I'm not a crunchy cookie fan, and I admit that these cookies took me a while to warm up to, because they are very crunchy. Wafer-thin and crispy, these lemony cookies were a far cry from the chewy cookies that I normally prefer, but as I sat munching one, I thought about it: if these cookies were chewy, it would be weird. The delicate crunch works well with the tangy, dainty flavor of these cookies, and a heartier "chew" would just throw all of that off.


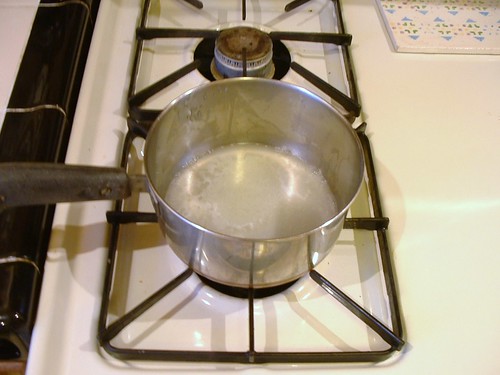
When I started this recipe, the first step really intrigued me. It involved reducing 1/4 cup of lemon juice in a pan and then adding 1 stick of butter. This gave the cookies a really intense lemon flavor. Side note: despite two wonderful things (lemons and butter), don't be tempted to taste this. It's really gross. I'll let you guess how I figured this part out...


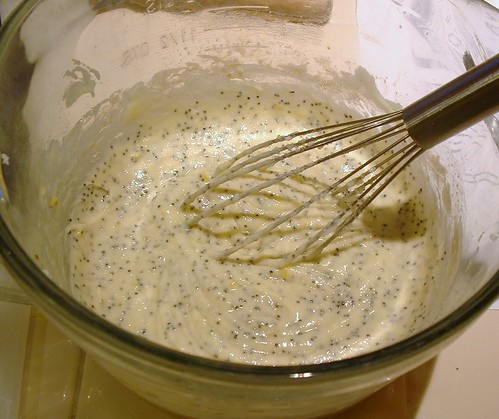
Aside from the reduction step, the rest of the recipe is a pretty straightforward cookie recipe - cream the remaining butter with the sugar, add egg and lemon butter mixture, add vanilla and zest, and then the dry ingredients and poppy seeds. I found that the dough was really loose, but it made for good cookies still, so don't worry if it looks more like a cross between cookie and cake batter than cookie dough.

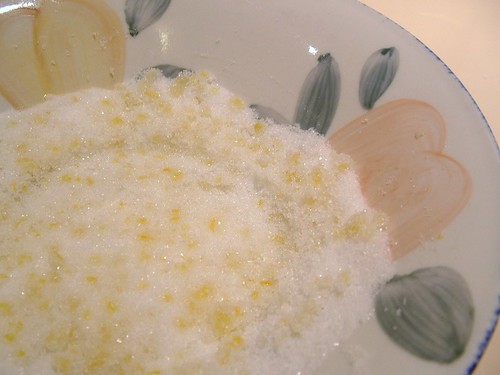
The last step of this recipe was to roll spoonfuls of dough in a sugar-lemon zest combination, and this made the outside of the cookie have a beautiful sheen, and a very tangy first bite. The zest sort of infuses with the sugar so everything tastes lemony, and it's awesome. One word of caution: the zest makes the sugar rather moist and clumpy, so rolling out the last few cookies can be difficult (too much sugar wants to stick to the dough).


And tah dah! Beautiful, lemon poppy seed cookies! But can you tell from this picture what I forgot? I was such an eager beaver to get these babies in the oven that I didn't sprinkle poppy seeds on top - doh! I remembered for the last batch, but the rest of the cookies were woefully naked.

Print This Recipe 

Recipe:
Adapted from MarthaStewart.com 

1/4 cup fresh lemon juice, plus 3 1/2 teaspoons freshly grated lemon zest (2 to 3 lemons)
2 sticks unsalted butter (8 ounces)
2 cups all-purpose flour
1 teaspoon baking powder
1/2 teaspoon salt
1 1/2 cups sugar
1 large egg
2 teaspoons vanilla extract
1 tablespoon poppy seeds, plus more for sprinkling

1. Preheat oven to 375 F. Bring lemon juice to a simmer in a small saucepan over medium heat; cook until reduced by half. Add 1 stick of butter; stir until melted.

2. In a medium sized bowl, whisk together flour, baking powder, and salt. In a large bowl, cream remaining stick of butter and 1 cup of sugar on medium speed. Mix in egg and lemon butter. Mix until pale, about 3 minutes. Mix in vanilla and 2 teaspoons zest. Mix in flour mixture and poppy seeds.

3. Stir together remaining 1/2 cup sugar and 1 1/2 teaspoons zest. Roll spoonfuls of dough into 1 1/2-inch balls; roll them in sugar mixture. Place 2 inches apart on baking sheets. Press each with the flat end of a glass dipped in sugar mixture until 1/4 inch thick. Sprinkle with poppy seeds. (I found that 1-inch balls worked better than 1 1/2-inch. The cookies baked more evenly that way)

4. Bake until just browned around bottom edges, 10 to 11 minutes. Transfer to wire racks; let cool completely.

Wednesday, June 2, 2010

Mexican Hot Chocolate Cookies


Have you ever wanted to try something so badly that it almost pains you when you can't get your way? Well, that's how I felt when decided I wanted to try to make these cookies. My  interest in making Mexican Hot Chocolate Cookies started a few months ago, but I couldn't find the perfect recipe. I searched and searched, but nothing seemed to be doing it for me. Yesterday, while browsing Martha Stewart's website for the first time in my life (sorry to all the Martha haters out there), I finally found it.

This recipe is sort of like a chocolate snickerdoodle - it requires the balls of dough to be rolled in a cinnamon-sugar mixture before baking, but there's a twist: add chile powder. I tried half of my cookies without the powder and half with it, because I was worried it would be too spicy for my mom (she's a super spice weenie). My conclusion? The chile powder is totally, TOTALLY worth it. It doesn't add any noticeable spiciness, but it does add a little, almost undefinable, flavor (unless you know the ingredient) that takes this cookie to the next level.

My mother, who is a pretty tough critic, has proclaimed this her new favorite cookie, which should prove to you just how awesome this recipe is.

Recipe:
Adapted from MarthaStewart.com

2 1/4 cups all-purpose flour
1/2 cup unsweetened cocoa powder
2 teaspoons cream of tartar
1 teaspoon baking soda
1/2 teaspoon salt
1 cup (2 sticks) unsalted butter, softened
1 3/4 cups sugar
2 large eggs
2 teaspoons cinnamon
1/2 teaspoon chile powder (optional)

1. Preheat oven to 400 F. In a medium bowl, sift together flour, cocoa powder, cream of tartar, baking soda, and salt. In a large bowl, beat butter and 1 1/2 cups sugar on medium speed until light and fluffy, about 2 minutes. Add eggs and beat to combine. With mixer on low, gradually add flour mixture and beat until combined.
2. In a small bowl, combine remaining 1/2 cup sugar, cinnamon, and chile powder (if using). Using heaping tablespoons, form balls of dough and roll in cinnamon-sugar mixture. Place, about 3 inches apart, on parchment-lined baking sheets. Bake until cookies are set in center and begin to crack, about 10 minutes.

Wednesday, May 12, 2010

Snickerdoodles

Story time: I have a dog named Snickers, and all throughout high school I always felt uncomfortable making/eating snickerdoodles because they reminded me of my dog (I never felt weird about eating the Snickers candy bar, though - go figure).

Anyway, I just made a batch of Snickerdoodles to bring to a study group tomorrow, and I must say that I think I was definitely missing out  in high school for having a snickerdoodle-phobia. These cookies are spicy-sweet, crunchy on the outside and melt-in-your-mouth soft on the inside. It's such a satisfying cookie to bite into!

I used the recipe that was posted on How To Eat A Cupcake, but I decided to post them here mostly because I made my cookies a lot smaller than she did (about 2 inches in diameter rather than 4). This had mixed effects: the outside had a nice crunch to it and the cookies rose magnificently, but there was still a small part in the middle of the cookie that didn't bake all the way through. Despite this little hiccup, I would definitely make this recipe again!

Snickerdoodles
Makes about 40 medium cookies
INGREDIENTS
1/2 cup butter, softened
1/2 cup shortening
1 1/2 cups white sugar
2 eggs
2 teaspoons vanilla extract
2 3/4 cups all-purpose flour
2 teaspoons cream of tartar
1 teaspoon baking soda
1/4 teaspoon salt
2 tablespoons white sugar
2 teaspoons ground cinnamon

DIRECTIONS
1. Preheat oven to 400 F.
2. Cream together butter, shortening, 1 1/2 cups sugar, eggs, and vanilla. Mix in the flour, cream of tartar, soda and salt. Shape dough by rounded spoonfuls into balls. I found that shaping all of the balls before rolling in the sugar mixture really helped - that way they wouldn't get goopy from my cinnomon-y hands between rolls.
3. Mix the 2 tablespoons sugar and the cinnamon. Roll balls of dough in mixture. Place 2 inches apart on ungreased baking sheets. I found I needed a little more than this. Try 3 tablespoons of sugar and 1 tablespoon of cinnamon.
4. Bake 8 to 10 minutes, or until set but not too hard. Remove immediately from baking sheets.