Showing posts with label chocolate. Show all posts

Saturday, October 30, 2010

Oreo Cream Cheese Brownies

Cream Cheese Oreo Brownies (2)

I still remember the first time I decided to share one of my baked goods. I was a junior in high school and my AP Music Theory class was having a party for some reason (only we called it a "Cultural Gathering" because that made it more school appropriate, of course). I baked Peanut Butter Cookies, packed them ever so carefully in my mother's tupperware containers, and sat with them in my lap on the bus all the way to school.

At the beginning of our cultural gathering, I gingerly opened the tupperware and set my cookies on the table surrounded by generic bags of chips and a few odd pieces of candy. I was nervous - what if nobody ate my cookies? What if I had mutant tastebuds and for some reason the cookies that I thought were so delicious were actually really, really gross?

I mentally bit my nails in apprehension, and then the test of all tests: my music teacher took a cookie. She also took a chocolate chip cookie that someone else in the class had made. After a few minutes of chewing and thoughtful deliberation, she said, "Wow, sorry to whoever made these peanut butter cookies, but these chocolate chip cookies OWN them." (Needless to say, she wasn't the most considerate person I've ever met.)

But my heart was crushed. My cookies were lame. I didn't bake for anyone outside of my family for years after that, and on the rare occasion that I did, I would get ridiculously nervous.

Cream Cheese Oreo Brownies

Since the start of this blog, however, I've become more confident with my baking skills and I'm almost positive I don't have mutant taste buds (although my preference for peanut butter in my oatmeal might make some question). Because of this, I decided to bring brownies to one of my classes this semester.

This particular class, a 15 person seminar taught by an honest-to-goodness professor, is way WAY out of my comfort zone. I'm used to being taught by grad students. I'm used to being nearly invisible amongst the 300+ students in my lecture halls. I'm used to absorbing information, rather than giving my imput. Basically, this class is scaring the living daylights out of me.

But I've started bringing my baked goods with me, and this small action has helped me chip away at my fears, because it gives me an entrance talking point, rather than having to jump into dense, complicated Chinese politics right off the bat. Now my mind can rest easy knowing that even if my intellectual comments might not be the most insightful in the room, at least I make gosh darn delicious desserts.

Cream Cheese Oreo Brownies 3

If you are thinking of taking something to share with others and you are scared about mutant taste buds, you'll have nothing to fear with these cream cheese oreo brownies. I'm glad I took them to class, because I honestly think my roommate and I would have eaten the entire pan in the course of a day. The chocolate brownie base is crunchy from the cookies, but the cream cheese topping gives the brownie a creamier, more decadent flavoring. My only gripe with this recipe is that I couldn't really taste the oreos. It may have been due to the generic brand I opted for, but my advice is to increase the oreo amount a little bit and definitely stick with the name brand.

Recipe:
Adapted from Annie's eats 

Print Me! 

1/2 cup unsalted butter 
3/4 cup sugar
1 cup all-purpose flour
1/2 cup unsweetened cocoa powder (Dutch or natural is fine)
1/2 teaspoon salt
2 large eggs
1/4 cup milk
1 1/2- 1 3/4 cup coarsely chopped Oreo cookies
6 ounces room tempurature cream cheese
1/2 cup powdered sugar
1 1/2 teaspoons vanilla extract

1. Preheat oven to 350 F. Line an 8 x 8 baking pan with parchment paper and spray with cooking oil.
2. In a small sauce pan, mix butter and sugar over medium heat. Bring to a boil, making sure to whisk frequently. Let boil for 1 minute, then remove from heat to cool slightly.
3. In a medium bowl, whisk together flour, cocoa powder, and salt. In the pan with the cooling butter/sugar mixture, add the eggs. Whisk until well blended. Add milk and whisk until well blended. Add the wet ingredients to the flour mixture and stir until just incorporated. Fold in the chopped Oreos and spread batter in the pan.
4. For the cream cheese topping, combine the cream cheese, powdered sugar, and vanilla in a bowl. Mix until well blended and smooth. In small dollops, drop the cream cheese mixture on top of the unbaked brownie batter. Using the blade of a knife, drag the blade through the batter to make pretty designs and create a marbled effect.
5. Bake 22-24 minutes (mine took closer to 30). Allow to cool completely before serving. (I found that refrigerating them helped me cut them more neatly. If you don't intend to eat the entire pan at once, you should also consider keeping the leftovers in the fridge due to the cream cheese topping.)

Sunday, October 10, 2010

Happy Birthday to Me!

This year was a big birthday number for me. The big two zero. A pair of decades. Something without a "teen" at the end.

I dreaded it all year.

In my mind, turning 20 sucked. It signaled the end of my childhood, because there is almost no way to justify still calling yourself a kid once your age no longer ends in "teen." (All the way through age 19 I refused to allow anyone to call me an adult.)

But on my birthday I got my closure. It was a bittersweet farewell, but my childhood and I gracefully parted ways. I said goodbye and dulled the melancholic end by throwing the best cake party ever.

Birthday Cake 2 

My one stipulation for my birthday this year was that my friends allow me to bake my own cake. Now, knowing my somewhat tragic caketastrophic past, I was a little worried that I would make myself cry on my birthday from another cake upset. However, partly due to my apartment's culinary restraints (I own no 9-round pans, hand beaters, or candy thermometer...sigh) and partly due to my stress preventative measures (namely choosing and easy recipe), my cake turned out quite well!

I felt warmed from the inside as I sat around my coffee table with several of my good friends. There was laughing and smiling, awkward introductions and people trying to remember names, and many Happy Birthdays wished.

Sitting back for a moment, I reflected upon how great 20 really was. I have amazing friends that care about me, a roommate that is like a sister, an apartment I love, and even a really cool job. Thinking about all of this, I realized that all of these things are cool things about being an adult, not a kid. I'd never have a roommate in high school or be able to say that I rented my own apartment. I realized that I was excited for my adult life.

Birthday Cake

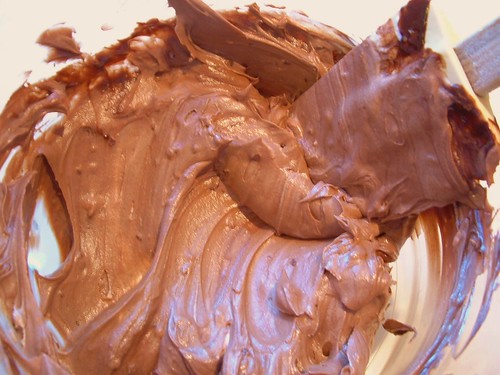
And then, of course, there was the cake. It was moist and flavorful, slightly dense but in the most delicate way possible, and satisfying in that homemade kind of way. While nervous about the frosting ("after all", I wondered, "how can sour cream make a good cake frosting?"), it turned out to be one of the most flavorful and creamy frostings I've ever encountered. Unlike a lot of frostings, the sweetness of this one was understated and allowed the chocolate (rather than the sugar) to take center stage, complimenting the subtle cake base with a degree of expertise.

All in all, out of the 20 I've had so far, this birthday definitely was the best, and the cake comes highly recommended, too.

For the recipe, please visit Smitten Kitchen. The source of my stress-free cake and countless hours of admiration. Thanks for the great birthday recipes, Deb!

Friday, September 10, 2010

Cocoa Brownies, A Success Story

Cocoa Brownies 2

So do you remember that ill-fated day when I attempted to make brownies from America's Test Kitchen? It was pretty embarrassing, let me tell you. You want to know something even more embarrassing? That post is the most viewed post on my blog. I think I'll just sink down really low in my desk chair and hope that the embarrassment will pass (a tactic that works wonders in class, by the way).

But I've never been one to submit to defeat. Even though my baking pride was wounded and I felt tragically incompetent, I knew that successful brownies were within my reach. Thousands upon thousands of other bakers have successfully made brownies from scratch, so why not me? I couldn't think of a good answer to that, and I therefore gathered my ingredients, preheated the oven, and tried again.

And guess what? I am proud to say that I succeeded. I . Made. Successful. Brownies.

...
WAHOOOOO!!!

*Ahem*
Sorry for the outburst, I'm just really excited about my delicious brownies. I got my recipe from Smitten Kitchen (wow, that's two in a row on my blog - I guess we all know who I like to go to for inspiration now...), and I admit that I was a little hesitant about making pure cocoa powder brownies without any actual melted chocolate in them, but I just went for it.

Cocoa Brownies

Unlike last time, I made sure I took them out even though they didn't look quite done, because I knew that over-baking was my downfall last time. I anxiously waited for them to cool so that I could cut one and figure out whether my second brownie endeavor was a failure or not. When I took my first bite, I knew I had made a winning batch. They had a satisfying chew to them and oh so much chocolaty flavor that a large, large glass of milk is definitely a must for consuming this dessert. In fact, these brownies were so good that my roommate pointed out something to me that I have no qualms about:

She said to me, "Anna, how many brownies did you make?" 
She held up the number 10. 
Continuing, she said, "How many did I eat?" 
She held up the number 1.
"And... how many are left?" Three.

After this conversation took place, I promptly ate two of the remaining three brownies. For dinner. Gosh they were good.

Cocoa Brownies 3

Recipe:
Adapted from Smitten Kitchen

Makes 25 smaller brownies (I halved my recipe, which is why I had 10)

10 tablespoons unsalted butter
1 1/4 cups sugar
3/4 cup plus 2 tablespoons unsweetened cocoa powder
1/4 teaspoon salt
1/2 teaspoon pure vanilla extract
2 large eggs, cold
1/2 cup all-purpose flour
2/3 cup walnut or pecan pieces (optional)

1. Position a rack in the lower third of the oven and preheat the oven to 325°F. Line the bottom and sides of an 8×8-inch square baking pan with parchment paper or foil, leaving an overhang on two opposite sides.
2. Combine butter, sugar, cocoa, and salt in a microwave-safe bowl. Microwave for 20 seconds at a time until butter is completely melted. Stir the mixture until it is smooth (it will look fairly gritty).
3. Stir in the vanilla. Add the eggs one at a time, stirring vigorously after each one. When the batter looks thick, shiny, and well blended, add the flour and stir until you cannot see it any longer, then beat vigorously for 40 strokes with the wooden spoon or a rubber spatula. Stir in the nuts, if using. Spread evenly in the lined pan.
4. Bake until a toothpick plunged into the center emerges slightly moist with batter, 20 to 25 minutes. Let cool completely on a rack.

Sunday, June 27, 2010

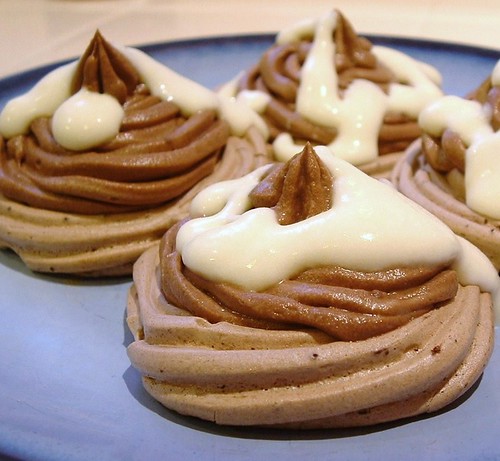
Daring Baker Challenge: Chocolate Mousse Pavlovas

The June 2010 Daring Bakers’ challenge was hosted by Dawn of Doable and Delicious. Dawn challenged the Daring Bakers’ to make Chocolate Pavlovas and Chocolate Mascarpone Mousse. The challenge recipe is based on a recipe from the book Chocolate Epiphany by Francois Payard.


This was my very first Daring Baker's challenge, and I was nervous and excited to trying something so challenging for my beginning baking level. I admit that I was so geeked up about trying my first challenge, that I waited anxiously at my computer on the recipe release date and kept refreshing until the June Challenge tab popped up. I rushed to print out the recipe, and then read through it thoroughly to see what it would entail.


Then, of course, my giddiness ran into a snag: Mascarpone cheese? Cups upon cups of heavy cream? Those weren't things I could find cheaply at the local market. I mentioned to my mom that I would need a ride to the store to buy these things, and she said she would be willing to do it later. I agonizingly waited for a whole entire week. It was excruciatingly painful, let me tell you, but I finally managed to get the the supermarket and I practically sprinted to the dairy aisle to find my ingredients.


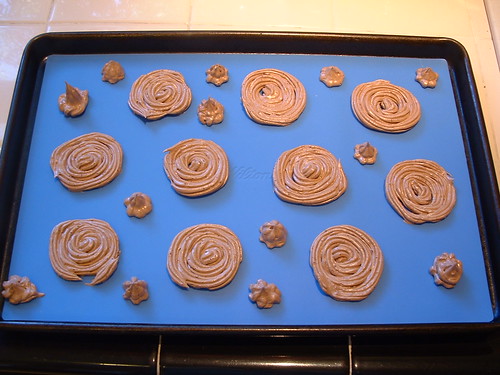
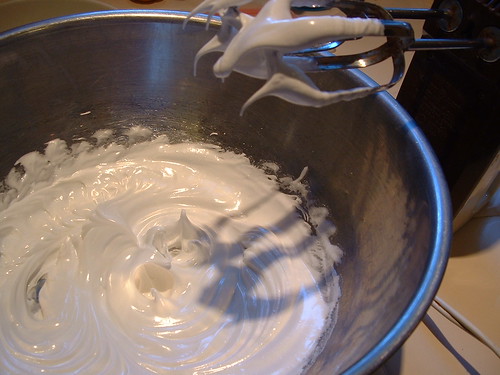
Then I baked. And baked and baked and baked, because this recipe was really involved. There were 3 separate components to make, and each one was outside the realm of my prior baking experience. First off was the chocolate meringue, which went surprisingly well. I was a little worried that my oven wouldn't be able to have a temperature low enough for it (it stops at 250 F), but it was fine. And, of course, piping the pavlova bases out was a lot of fun. I made little meringue kisses, too, because I had a feeling my brothers would like those.


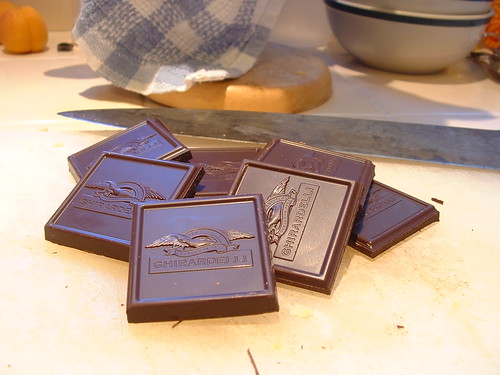
While the meringue was baking, it was time to make the mousse. Never in my life have I eaten mousse, let alone make it, so I was pretty nervous. But the recipe for the mousse started out with the most wonderful ingredient that I could ever ask for: an entire bar of 72% cacao chocolate. Amazing.


I melted the chocolate and added the lemon zest (which, by the way, I would omit next time, because it gave the mousse a gritty texture and didn't add that much notiecable flavor) and Grand Marnier (I always feel so fancy when I say that with a French accent. Give a try, you know you want to).


After whipping the egg whites for the meringue, whipping the mascarpone cheese with the heavy cream didn't seem quite as daunting. As a result, the mousse went off most successfully.


The creme anglais topping also went down without a hitch, and it just so happened to be the most wonderful thing I've ever tasted in my life. Creme Anglais isn't specific to this recipe, so if you haven't ever tried it, please please PLEASE make some. It's so freaking delicious. Unfortunately, I didn't buy quite enough Mascarpone cheese to make the official challenge "Mascarpone Cream Topping", but simply drizzling the creme anglais on top of the finished pavlovas tasted excellent, too.

And that's it! I'm happy to say that my very first Daring Baker's Challenge was a complete and utter success! The one thing I would caution about if anyone out there wants to try it, is that I halved all the recipes, and still ended up with too much of everything! The meringues disappeared quickly enough, but there was so much leftover mousse and creme anglais that despite my best efforts (and believe you me, I definitely tried to eat as much as a could!), I still had to throw some of it away. If I make this again, I would use the original recipe amount for the meringue, but halve the recipes for the mousse and creme anglais.

If you do decide that this recipe looks so delicious that you want to try it out, head on over to The Daring Kitchen, where the recipe will be posted, along with pictures of other Daring Bakers' Chocolate Pavlovas!

Wednesday, June 2, 2010

Mexican Hot Chocolate Cookies


Have you ever wanted to try something so badly that it almost pains you when you can't get your way? Well, that's how I felt when decided I wanted to try to make these cookies. My  interest in making Mexican Hot Chocolate Cookies started a few months ago, but I couldn't find the perfect recipe. I searched and searched, but nothing seemed to be doing it for me. Yesterday, while browsing Martha Stewart's website for the first time in my life (sorry to all the Martha haters out there), I finally found it.

This recipe is sort of like a chocolate snickerdoodle - it requires the balls of dough to be rolled in a cinnamon-sugar mixture before baking, but there's a twist: add chile powder. I tried half of my cookies without the powder and half with it, because I was worried it would be too spicy for my mom (she's a super spice weenie). My conclusion? The chile powder is totally, TOTALLY worth it. It doesn't add any noticeable spiciness, but it does add a little, almost undefinable, flavor (unless you know the ingredient) that takes this cookie to the next level.

My mother, who is a pretty tough critic, has proclaimed this her new favorite cookie, which should prove to you just how awesome this recipe is.

Recipe:
Adapted from MarthaStewart.com

2 1/4 cups all-purpose flour
1/2 cup unsweetened cocoa powder
2 teaspoons cream of tartar
1 teaspoon baking soda
1/2 teaspoon salt
1 cup (2 sticks) unsalted butter, softened
1 3/4 cups sugar
2 large eggs
2 teaspoons cinnamon
1/2 teaspoon chile powder (optional)

1. Preheat oven to 400 F. In a medium bowl, sift together flour, cocoa powder, cream of tartar, baking soda, and salt. In a large bowl, beat butter and 1 1/2 cups sugar on medium speed until light and fluffy, about 2 minutes. Add eggs and beat to combine. With mixer on low, gradually add flour mixture and beat until combined.
2. In a small bowl, combine remaining 1/2 cup sugar, cinnamon, and chile powder (if using). Using heaping tablespoons, form balls of dough and roll in cinnamon-sugar mixture. Place, about 3 inches apart, on parchment-lined baking sheets. Bake until cookies are set in center and begin to crack, about 10 minutes.

Sunday, May 16, 2010

Recipe Review: America's Test Kitchen Brownies

America's Test Kitchen is my new favorite show; it even trumps 30 Rock, which is saying something because I LOVE Tina Fey. Through a two-day marathon of watching episodes online, I think I've learned more about cooking than I would have ever learned by looking things up on Wikipedia (my love for Wikipedia is also very deep - just don't tell my professors that).

After watching a gajillion episodes, I decided it was time to take my new-found inspiration to the kitchen and make something I've never tried to make before, and my sights landed on the ever-decadent chocolate brownie.

The reason that I've never made them before is because my mom always just got the box mixes and discouraged me from trying to make them from scratch. She said the "boxes were better." Well, just because she made this claim didn't mean that I believed her. (Although I'm learning more everyday about how many things my mom is right about: bring a sweater everywhere, take vitamins, get enough sleep... the list is never-ending. But in the case of brownies, I still thought she was terribly wrong.)

So today, I put two and two together: if my mom says that making good brownies from scratch is difficult, and America's Test Kitchen perfects difficult-to-perfect recipes - gasp! - why don't I make America's Test Kitchen Brownies?!


Making the brownies was not too difficult. I made sure I had everything ready to go before I started, because some of the steps were somewhat time-sensitive, but I double-checked everything in the recipe so I'm fairly confident that I got everything correct.

Even with all of my careful recipe-reading and ingredient measuring, these brownies just didn't work for me. When I took them out of the oven, the insides were still really gooey and looked undone. I put them back in the oven for a fairly substantial amount of time, and this gooey appearance did not go away. I ended up putting them in the oven for so much longer that they turned out really, really chewy (and not in a good way) and tough around the edges - I could barely get the knife through them when they cooled completely. Perhaps if I took them out of the oven at the recommended time they wouldn't be so tough, but I'm pretty sure the insides wouldn't have been done if I had followed that course of action.

I'm not going to lie - I was pretty disappointed that the first recipe I tried from my new cooking idols turned out to be a flop. But I'll try more of their recipes before I solidify my opinion about them. In the meantime, I'm still on the search for an excellent brownie recipe so that I can prove to my mom that homemade is better!

In case you want to try it for yourself (maybe you'll have better luck than me), here's the recipe:

Chewy Brownies:
From America's Test Kitchen

INGREDIENTS

1/3cup Dutch-processed cocoa
1 1/2teaspoons instant espresso (optional)
1/2cup plus 2 tablespoons boiling water
2ounces unsweetened chocolate , finely chopped
4tablespoons (1/2 stick) unsalted butter , melted
1/2cup plus 2 tablespoons vegetable oil
2large eggs
2large egg yolks
2teaspoons vanilla extract
2 1/2cups (17 1/2 ounces) sugar
1 3/4cups (8 3/4 ounces) unbleached all-purpose flour
3/4teaspoon table salt
6ounces bittersweet chocolate , cut into 1/2-inch pieces

INSTRUCTIONS


  1. 1. Adjust oven rack to lowest position and heat oven to 350 degrees. Referring to directions in Making a Foil Sling (related), make sling using the following steps: Cut 18-inch length foil and fold lengthwise to 8-inch width. Fit foil into length of 13 by 9-inch baking pan, pushing it into corners and up sides of pan; allow excess to overhang pan edges. Cut 14-inch length foil and fit into width of pan in the same manner, perpendicular to the first sheet (if using extra-wide foil, fold second sheet lengthwise to 12-inch width). Spray with nonstick cooking spray.
    2. Whisk cocoa, espresso powder (if using), and boiling water together in large bowl until smooth. Add unsweetened chocolate and whisk until chocolate is melted. Whisk in melted butter and oil. (Mixture may look curdled.) Add eggs, yolks, and vanilla and continue to whisk until smooth and homogeneous. Whisk in sugar until fully incorporated. Add flour and salt and mix with rubber spatula until combined. Fold in bittersweet chocolate pieces.
    3. Scrape batter into prepared pan and bake until toothpick inserted halfway between edge and center comes out with just a few moist crumbs attached, 30 to 35 minutes. Transfer pan to wire rack and cool 1½ hours.
    4. Using foil overhang, lift brownies from pan. Return brownies to wire rack and let cool completely, about 1 hour. Cut into 2-inch squares and serve.


Saturday, May 15, 2010

Celebration Crepes

What did I do today, you ask? Okay, well you didn't ask, but I bet you're wondering now. And now that you are intensely curious, I shall tell you what I did. Are you ready for this? Today I did... nothing. Absolutely nothing, and it was wonderful.

I finished my last final of Spring semester last night, and when I woke up today I felt oddly light and carefree knowing that I didn't have any homework to work on, essays to write, or tests to study for. I started the day by sleeping in and reading in bed until way too late, and when I finally left the comfort of my covers, I turned my computer on and spent two hours watching archived episodes of America's Test Kitchen online. Be jealous. Be very, very jealous of my day of pure bliss.


But what is the perfect end to such a wonderfully lazy day? By making sweet chocolate crepes for dinner, of course! It was my first time making crepes (I get to check them off my list of recipes I want to make - woo hoo!), and it went surprisingly well. It took a few crepe-sacrifices to finally get the swirling technique down to spread the crepes thin enough, but then it went down without a hitch. I made a chocolate sauce to go along with it because there's nothing else to eat in the apartment, and I was much too comfortable in my pajamas to go to the store for other ingredients.

So enough of me gloating about my excellent kickoff to summer, let's get to pictures and recipes, shall we?

Basic Crepes
Adapted from allrecipes.com


Serves 4

INGREDIENTS
1 cup all-purpose flour
2 eggs
1/2 cup milk
1/2 cup water
1/4 teaspoon salt
2 tablespoons butter, melted

DIRECTIONS
1. In a large mixing bowl, mix together the milk, water, and the eggs; gradually whisk in flour, stirring to combine. Add the salt and butter; beat until smooth.


2. Heat a slightly oiled griddle or frying pan over medium-high heat. Scoop the batter onto the griddle using a 1/4 cup measurer. Tilt the pan with a circular motion so that the batter coats the surface evenly.


3. Cook the crepe for about 2 minutes, until the bottom is light brown. Loosen with a spatula, turn and cook the other side. Serve hot.


Chocolate Sauce
Adapted from helpwithcooking.com


Makes about 1/2 cup

INGREDIENTS
3 oz chocolate, chopped
3 oz water
1 tablespoon powdered sugar
1/2 tablespoon butter
dash of vanilla extract
1/4 teaspoon cornstarch


1. Combine all ingredients in a small saucepan. Heat over low heat, stirring often.
2. When sauce beings to bubble, continue stirring until it thickens. Once thicker, remove from heat. The mixture won't be really thick, but it should resemble hot Hershey's syrup.

Saturday, May 8, 2010

Well, let's sum this one up to a "Learning Experience"

It's time for finals. And what does that mean in my world? Do anything but study.
I kid, I kid (I swear, Mom, I studied all day). But I did end my evening by trying a new baking recipe.

My options were rather limited, because I used the last of the eggs for a batch of cookies last week; but then I found the perfect candidate: Chocolate Blancmange. This recipe uses corn starch as its thickening agent rather than eggs, and it's made in a mold (like Jello). I had never heard of Blancmange before, but I decided to give it a go because worst case scenario I'd have chocolaty pudding to eat if it didn't turn out correctly. (I'm pretty sure Blancmange is like a thicker, molded pudding.)


So the making of the blancmange went pretty well; it might have turned out a little lumpier than recommended, but I'm still a novice at working with boiling milk. Waiting for it to chill was agonizing though, and I could hardly wait for it to be thick enough to put onto a plate to show all of its Blancmange Glory to the world.

But this is where things went terribly wrong. My spider-sense was tingling and I thought something might go wrong, so luckily I took a before picture. The blancmange was firm enough, but it was sticking to the sides of the bowl, so I decided to run it under some warm water. Apparently my blancmange decided it was ready to come out of the bowl while it was tipped precariously in the sink. Its life flashed before its eyes as half of the bowl's contents slopped into the sink full of dirty dishes. My visions of a beautifully molded dessert were no more.
I was pretty disappointed by the epic-failage of my mold-loosening abilities, but there's good news! It still tasted delicious. My prediction was right -- it pretty much tasted like really thick, rich, chocolaty pudding. But what's not to love about that?

So enough about my pathetic baking fail. Onto the recipe!


Chocolate Blancmange:
Adapted from 500 All-Time Great Recipes
Serves 4

4 tablespoons milk
2 1/2 cups milk
3 tablespoons brown sugar
3 ounces semisweet chocolate chips
1/4 teaspoon vanilla extract

1. Rinse a 3 2/3-cup fluted mold with cold water and leave it upside down to drain. Blend the cornstarch to a smooth paste with a little of the milk.
2. Bring the remaining milk to a boil, preferable in a nonstick saucepan, then pour onto the blended mixture, stirring all the time. Otherwise it will get all gross and goopy!
3. Pour all the milk back into the saucepan and bring slowly to a boil over a low heat, stirring all the time until the mixture boils and thickens. Remove the pan from the heat, then add the sugar, chocolate chips and vanilla extract. Stir until the chocolate has melted.
4. Pour the chocolate mixture into the mold and leave in a cool place for several hours. I took this to mean: Cool until room temperature, then move to the fridge.
5. To unmold the blancmange, place on a large serving plate, then holding the plate and mold firmly together, invert them. Give both plate and mold a gentle but firm shake to loosen the blancmange, then left off the mold. Serve immediately.

So there you have it. Tastes delicious, but I don't know how it actually looks when it's unmolded correctly. Lesson learned, though: Make sure you properly secure your blancmange if you decide to loosen it with warm water from the sink.