Showing posts with label bread. Show all posts

Monday, October 4, 2010

Zucchini Mozzarella Grilled French Toast Sandwiches

Zucchini Grilled Cheese 4

Wow. Whadda title, right? If you have one eyebrow raised in confusion, I really don't blame you. So many words thrown together, that it almost doesn't sound like it would be appetizing. But let me tell you: this is by FAR the best easy dinner I've made myself in quite a while.

It combines the great, gooeyness of a fresh mozzarella grilled cheese sandwich and the great heartiness of french toast. How does this sandwich accomplish this? By egg-dipping the sandwich before grilling, of course!

Zucchini Grilled Cheese 3

Now, I added the zucchini to make it healthy. If it has vegetables in it, it has to be good for you, right? Hmm... well, at least that's what I keep telling myself. Let's not take into account that I consumed half of a sauteed zucchini whilst waiting for my sandwich to grill.

But I really did tone down the unhealthiness of this recipe a bit (although if I had had the proper ingredients, things might have turned out verrrrry differently). I used whole wheat bread and used considerably less mozzarella than the recipe called for, and it still tasted amazing.

Zucchini Grilled Cheese 2

It was as if I had stepped in to a diner - there was the sizzling sound of oil on the stove and I could literally smell my sandwich getting crispy (is it possible to smell crispiness? I say it is).

Of course, the easiness of this recipe is somewhat mitigated by the heap ton of dishes that it accumulates (due to the three plates for dipping), but man oh man is it worth it.

Recipe:
Heavily adapted from "Nigella Bites" recipe for Mozzarella Carrozza


1/2 of a medium zucchini, cut into 1/4 inch slices
2 slices of bread
1 teaspoon fresh basil
1/4 cup mozzarella cheese (1/4 inch slices, preferrably)
1/4 cup milk
1 1/2 tablespoons flour
1 egg
salt and pepper
olive oil

1. In a frying pan, saute the zucchini slices in olive oil until slightly tender. Remove from heat.
2. Meanwhile, sprinkle basil on one slice of the bread, followed by evenly distributed mozzarella slices. When zucchini has finished, distribute on top of the mozzarella. Put the second bread slice on top, squishing the sandwich down a bit so it all sticks together.
3. Pour milk in one saucer, flour in another, and beat the egg with salt and pepper in another. As quickly as possible, drip sandwich in milk (bread will become too soggy quickly, so speed is crucial), then flour, then egg.
4. Using same pan as zucchini, put a hefty amount of oil in bottom and heat over medium heat. Add sandwich and fry in oil until crisp on each side. Cut in half. Apply to face and smile.
Makes 1

Tuesday, June 15, 2010

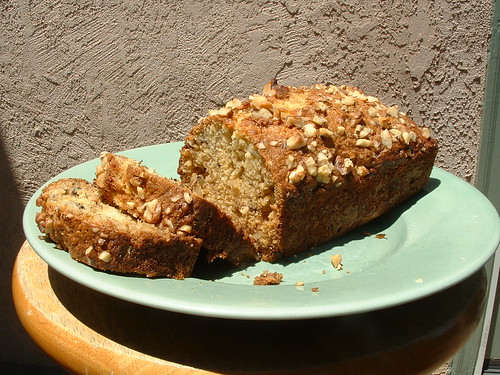
Anna Banana Bread


So my little brothers can be pretty funny guys. Real comedians, you know? The longstanding joke in the family: "Look under there!" ("Under where?") "Haha you said underwear!"

Hilarious, I know.

My mom is also pretty funny, but more so because of her quirky habits. For example, she insists on storing black bananas in the freezer with the peels in tact ("You can use them to bake us something, Anna!" she says). How she expects me to remove the frozen peels, I'll never know. This time, though, I noticed the browning bananas on the counter before she could freeze them, so I scooped them up, and decided to make banana bread. Operation Freeze-Bananas: Thwarted! (Let's play some heroic music in the background right here).

How on earth do the anecdotal stories about my insane little brothers and my quirky mom fit together, you ask? Well, when your name happens to be Anna, and this rhymes oh so well with the word banana, things sort of run their own course. Upon hearing that I was making banana bread with the rescued bananas, my youngest brother gasped, giggled, and then said, "ANNA BANANA BREAD!!! Mom, let's eat some Anna Banana Bread!" Unsurprisingly, this pun remained popular until the entire loaf was gone.

Being the good big sister that I was, I smiled and laughed every time my brothers made this joke, but when I make something with bananas in the future, I'm definitely not telling them that there's bananas in it.

Print This Recipe 

Recipe:
Adapted from The Joy of Cooking

1 1/3 cups all-purpose flour
3/4 teaspoon salt
1/2 teaspoon baking soda
1/4 teaspoon baking powder
1/3 cup unsalted butter, softened
2/3 cup sugar
2 large eggs
1 cup mashed very ripe banana (about 2)
1/2 cup chopped walnuts or pecans (optional)

1. Preheat over to 350 F. Grease an 8 1/2 x 4 1/2 inch loaf pan.
2. Whisk together thoroughly flour, salt, baking soda, and baking powder. In a large bowl, beat butter and sugar on high speed until lightened in color and texture, 2 to 3 minutes. Beat in the flour mixture until blended and the consistency of brown sugar. Gradually beat in eggs. Fold in banana and walnuts until just combined.
3. Scrape the batter into the pan and spread evenly. Bake 50 to 60 minutes, until a toothpick inserted in the center comes out clean. Let cool 5 to 10 minutes before unmolding to cool on a rack.

Sunday, June 13, 2010

Irish Soda Bread and Kittens


Time for a quiz: What is the absolute cutest thing in the world?

Err... not Irish Soda Bread, if that's what you were thinking. That would just be awkward.
The answer to this question that I was looking for is: kittens! But um... there's one thing that a lot of people fail to think of when they say "awwww, how cute!", and that would be how much sleep kittens steal away from you.


My family rescued three kittens from the side of the road a week ago, and while we work on finding homes for all of them, they are living in my room. Two nights ago, they decided that the perfect place to play kitten games would be right next to my face. At three o'clock in the morning. While I was trying to sleep.

Don't get me wrong - these kittens are incredibly adorable, and I'll be sad to see them go, but the lack of sleep is definitely catching up with me. I was such a zombie yesterday that I couldn't even focus enough to figure out how to half a cookie recipe properly. I ended up staring at the ingredient list for five minutes in a sleepy stupor, then giving up the baking endeavor entirely.


This whole experience has made me gain an even larger appreciation for new moms, because they deal with sleepless nights for years. I'm in awe. So props to you, moms, I admire how you can be so sleep deprived but still act fully functional in society.

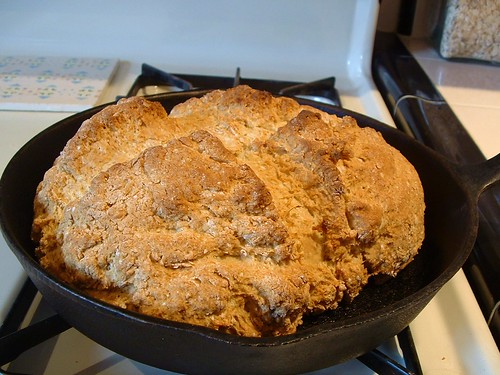
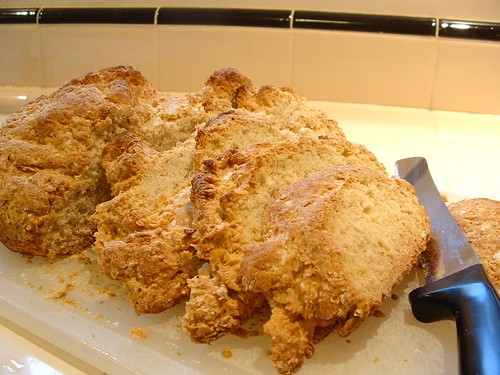
But even for the bakers out there who are a bit sleep deprived, I think anyone can make this Irish Soda Bread. I made it a few days ago to serve with dinner, and it was so easy! No yeast or extensive kneading required, and the whole project took less than an hour start to finish. It tasted delicious, and looked so rustic and pretty - sort of like a really, really giant biscuit. Yum!

Recipe:
Adapted from America's Test Kitchen

Print This Recipe!


3 cups all-purpose flour 
1 cup cake flour 
1 1/2 teaspoons baking soda 
1 1/2 teaspoons cream of tartar 
1 1/2 teaspoons salt 
2 tablespoons sugar 
2 tablespoons unsalted butter , softened
1 1/2 cups low-fat buttermilk 
1 tablespoon melted butter , optional

1. Heat the oven to 400 degrees and adjust a rack to the center position. Place the flours, soda, cream of tartar, salt and sugar in a large mixing bowl. Add the butter and rub it into the flour using your fingers until it is completely incorporated and the mixture resembles coarse crumbs. Make a well in the center and add the buttermilk. Work the liquid into the flour mixture using a fork until the dough comes together in large clumps. Turn the dough onto a work surface and knead briefly until the loose flour is just moistened. The dough will still be scrappy and uneven.

2. Form the dough into a round about 6 to 7 inches in diameter and place in a cast iron skillet. Score a deep cross on top of the loaf and place in the heated oven. Bake until nicely browned and a tested comes out clean when inserted into the center of the loaf, about 40 to 45 minutes. Remove from oven and brush with a tablespoon of melted butter if desired. Cool for at least 30 minutes before slicing. Serve slightly warm or at room temperature.

Wednesday, May 26, 2010

Baking with Kids: Tips and Tricks

My youngest brother was born when I was 14 and my other brother isn't much older - he was born when I was 11. This huge age difference caused me endless strife in high school, because I was constantly asked to babysit them after school and on weekends. While I enjoyed spending time with my little brothers from time to time, this rarely included something as involved as a baking project.

Since I have grown older and a tad bit wiser (although this point is arguable), I have come to realize that it's really fun to do things with my brothers, because they hold the time they spend with me very dear. Because of this, I decided to include them in my baking project the other day: making cornbread for dinner. (That's them in the picture, there. They're standing in front of our cornbread, but there's a terrible glare on the dish so you can't really see it... oops.)

In the past, the few baking projects I did with my brothers during high school were really frustrating for all of us. I'm a control freak who wouldn't let them help enough, they wanted to help TOO much, and then they ended up getting bored and leaving me to finish the project. Fun to an extent, but definitely lacking a good ending, don't you agree? To remedy this, I used several techniques I learned last summer as a camp counselor to help our most recent cooking project be more satisfying to all involved parties.


After a very successful batch of cornbread, I though to myself, "Hey, maybe there are some people out there in the internet world who would appreciate some tips on how to doing baking projects with their kids!" And that is the thought that inspired me to write this post. So the following is a list of things that I have found helpful when working with young children (my brothers are aged 8 and 5, if that gives you a reference point for what ages I'm dealing with).

Tips and Tricks:
  1. If you have a child that can read, have them read the list of ingredients and help to gather everything that is needed. This will help them feel included immediately, and will warm both of you up to each other's presence in the kitchen.
  2. Use a recipe that is pretty simple: not too many ingredients, no finicky steps (such as soft vs stiff peaked egg whites), and preferably something you have made before so you can catch when things are going off-track.
  3. If you have more than one kid working with you, make sure you alternate when each of them helps. This cuts back on sibling rivalry making for frustrated kids - if they feel included, they won't be jealous of their brother/sister.
  4. Do all the dangerous stuff yourself (ie putting things in the oven, cutting with sharp knives, and getting things off of high shelves), but explain why you are doing it. For example, say, "I am going to cut up this apple. Why do you think it's important to be careful when working with this knife?" Even though they won't be doing the cutting, they'll feel included because they are answering a question.
  5. Feel free to teach them things about cooking/baking as you work on your project. By telling them what baking powder does or why it's important to grease the pan, they understand the process better, and it allows for more interaction between yourself and the children.
  6. Let the kids crack the eggs, but make sure you do it in a separate bowl. This way you can fish out the inevitable bits of egg shell that end up mixed in with the egg.
And for all of you that are interested:
Cornbread Recipe:
Adapted from Albers Sweet Corn Muffins

1 1/2 cups all-purpose flour
1/2 cup white sugar
1/2 cup yellow or white corn meal
1 Tablespoon baking powder
1/2 teaspoon salt
1 1/4 cups milk
2 eggs, lightly beaten
1/3 cup vegetable oil

1. Preheat oven to 350 F. Grease an 8-inch-square baking pan.
2. Combine flour, sugar, corn meal, baking powder, and salt in medium bowl. Combine milk,eggs, and vegetable oil  in small bowl; mix well. Add to flour mixture; stir just until blended. Pour into baking pan.
3. Bake for 35 minutes, or until a toothpick inserted in the center comes out clean.

Saturday, May 22, 2010

Cinnamon Raisin Bread (aka A Way to Make the Whole House Smell Wonderful)

To me, one of the best smells in the entire world is cinnamon. No matter what time of year it is, what kind of mood you're in, or what type of sweet you feel like eating, cinnamon is the superhero of the spice world. So when I combined the magical aroma of cinnamon with they heavenly smell of rising yeast to make this cinnamon raisin-swirl bread, the entire house smelled amazing for the whole afternoon.


This bread definitely took quite a bit of time to make: an 1 1/2 to rise, another 1 1/2 rising in the pan after the loaf was formed, and then 45 minute in the oven, but it was worth it. It turned out looking beeeautiful, and it tasted light and sweet, too. 


The dough takes a bit of work, but aim to have your dough springy (when you lightly poke it, it will make an indent, but then retake its original form), and not too sticky.  I found that I had to use almost the entire amount of recommended flour to make my dough not be sticky.


In order to get the beautiful swirl shape when you cut into the loaf, you treat the dough sort of like a jellyroll: put the cinnamon/sugar mix and raisins on the rolled out dough, and then start at a long end and roll it all up! Make sure you pinch the seam closed, so that it won't fall apart later.


When you have made your jellyroll-ed dough, put it in your bread pan and let it rise again (so much rising!). Once it has risen, brush the top with egg and sprinkle with the leftover cinnamon/sugar mix. The egg on the crust made it a little crunchy, but I thought it gave the crust a nice, varied texture.


Then you put it in the oven and bake it until it looks wonderful and your whole house smells like cinnamon - yum!

Cinnamon Raisin Bread Recipe
Adapted from Joy of Cooking

2 1/4 teaspoons active dry yeast 
3 tablespoons warm (105 F to 115 F) water 
1 cup warm (105 F to 115 F) milk
5 tablespoons melted butter
3 tablespoons sugar
1 large egg
1 teaspoon salt
2 cups bread flour
1 1/2 to 2 cups all purpose flour

1/2 cup raisins
2 tablespoons brown sugar
2 teaspoons ground cinnamon
1 1/2 teaspoons melted butter
1 egg

Directions:
1. Combine yeast and warm water in a large mixing bowl and let stand until the yeast is dissolved, about 5 minutes.
2. Add milk, 5 tablespoons melted butter, 3 tablespoons sugar, 1 egg, and 1 teaspoon salt. Mix by hand or on low speed for 1 minute.
3. Gradually stir in bread flour. Gradually add all-purpose flour until the dough is moist but not sticky. Knead for 10 minutes until the dough is smooth and elastic.
4. Transfer the dough to an oiled bowl and turn it over once to coat with oil. Cover loosely with a damp towl and let rise in a warm place (75 F to 80 F) until doubled in volume, 1 to 1 1/5 hours.
5. While dough finishes rising, place raisins in a small saucepan with enough water to cover by 1/2 inch. Bring to a boil, drain well, and let cool. In a small bowl, stir together brown sugar and cinnamon.
6. Grease an 8 1/2 x 4 1/2-inch (6 cup) loaf pan. Punch the dough down. Using a rolling pin, roll the dough into an 8-inch-wide rectangle, about 1/2 inch thick. Brush the surface of the dough with 1 1/2 teaspoons melted butter.
7. Sprinkle all but 2 teaspoons of the cinnamon mixture over the dough, then spread the raisins evenly over the surface. Starting from one 8-inch side, roll up the dough as you would a jelly roll. Pinch the seam closed. Place seam side down in the pan. Cover loosely with oiled plastic wrap and let rise in a warm place until doubled in volume, 1 to 1 1/12 hours.
8. Preheat the oven to 375 F. Whisk 1 egg and brush over the top of the loaf. Sprinkle the top of the dough with the remaining cinnamon mixture.
9. Bake 40-45 minutes until the crust is deep golden brown and the bottom of the loaf sounds hollow when tapped. Remove the loaf from the pan to a rack. Let cool completely before slicing.